
As we near the one-year anniversary of its release (and the inevitable unveiling of its successor), the Samsung Galaxy Note 3 remains a device that packs quite a punch when it comes to hardware. It boasts a 2.3Ghz CPU and was the first mobile phone ever to house 3GBs of RAM. Suffice it to say, it can handle any software you throw at it with no discernible lag. Even Samsung's notoriously bloated TouchWiz ROM seems lightning fast.
It's almost scary to think how well this device could handle an even leaner, AOSP-based ROM, like CyanogenMod or ParanoidAndroid. When opting for AOSP ROMs over TouchWiz, people often report better battery life and faster speeds. It makes sense because of the less taxing software, but why take their word for it?
Installing a custom ROM onto your Note 3 may sound scary, but it's all made simple with a piece of software called a recovery, which you can have installed in minutes.
Prerequisites
This tutorial is geared for the Sprint and T-Mobile variants of the Samsung Galaxy Note 3. If you have AT&T or Verizon, you have a locked bootloader and cannot proceed with this guide. You can, however, check out our guide how to install the Safestrap custom recovery on your Note 3.
You'll also need to be rooted, which is now easier than ever, thanks to Towelroot.
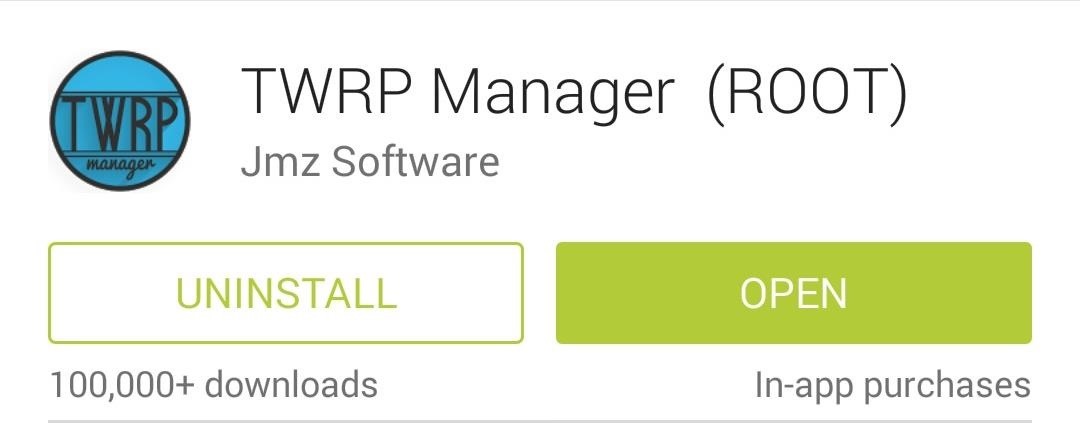
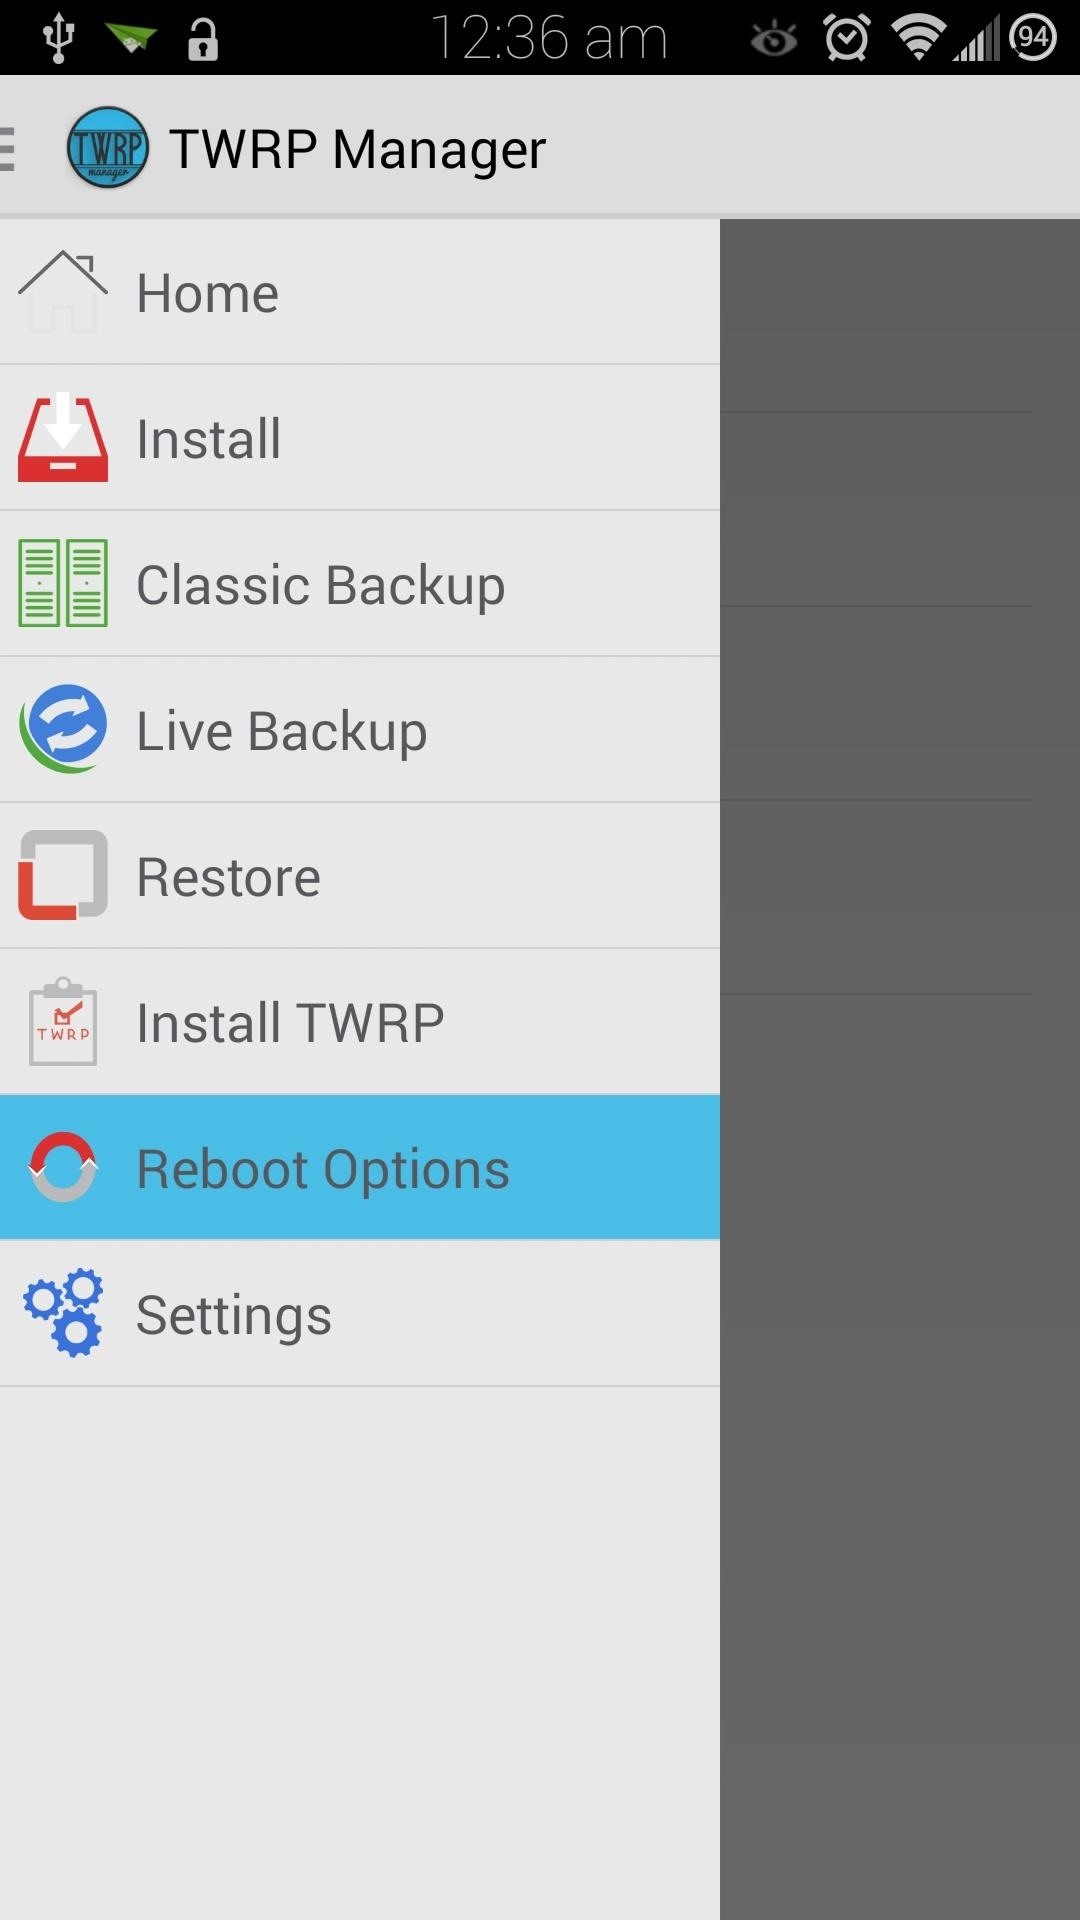
Step 1: Download & Install "TWRP Manager"
Jmz Software brings us the easiest way to install a custom recovery. TWRP Manager (ROOT) will allow you to install TWRP onto your phone in mere minutes, so grab it from Google Play to get started.
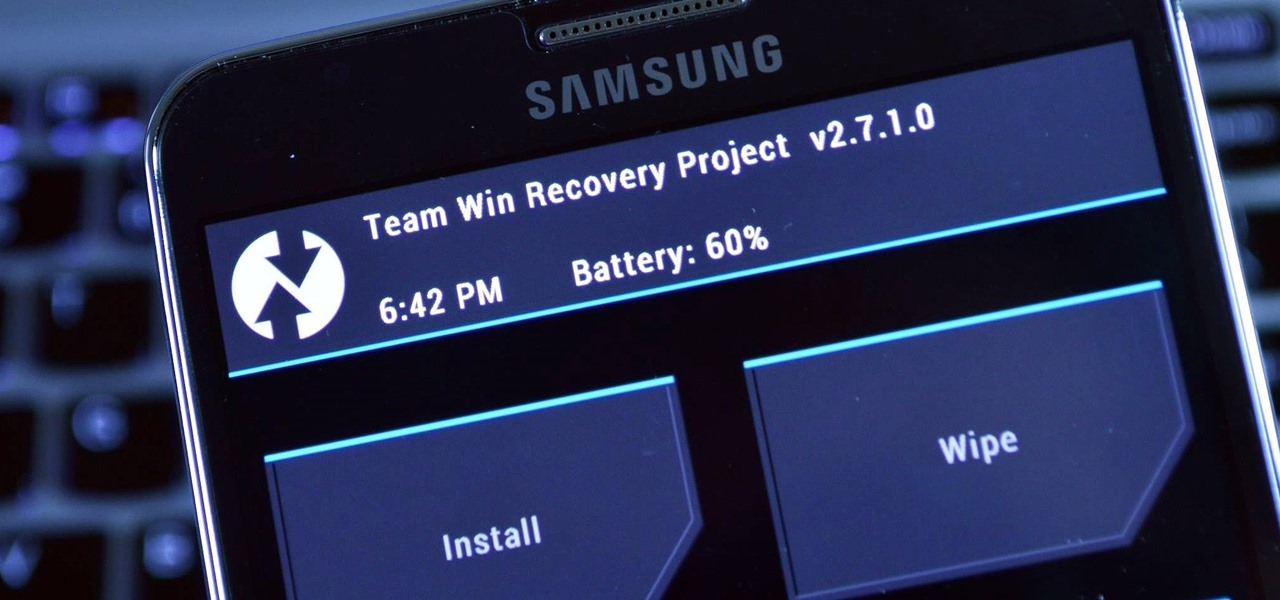
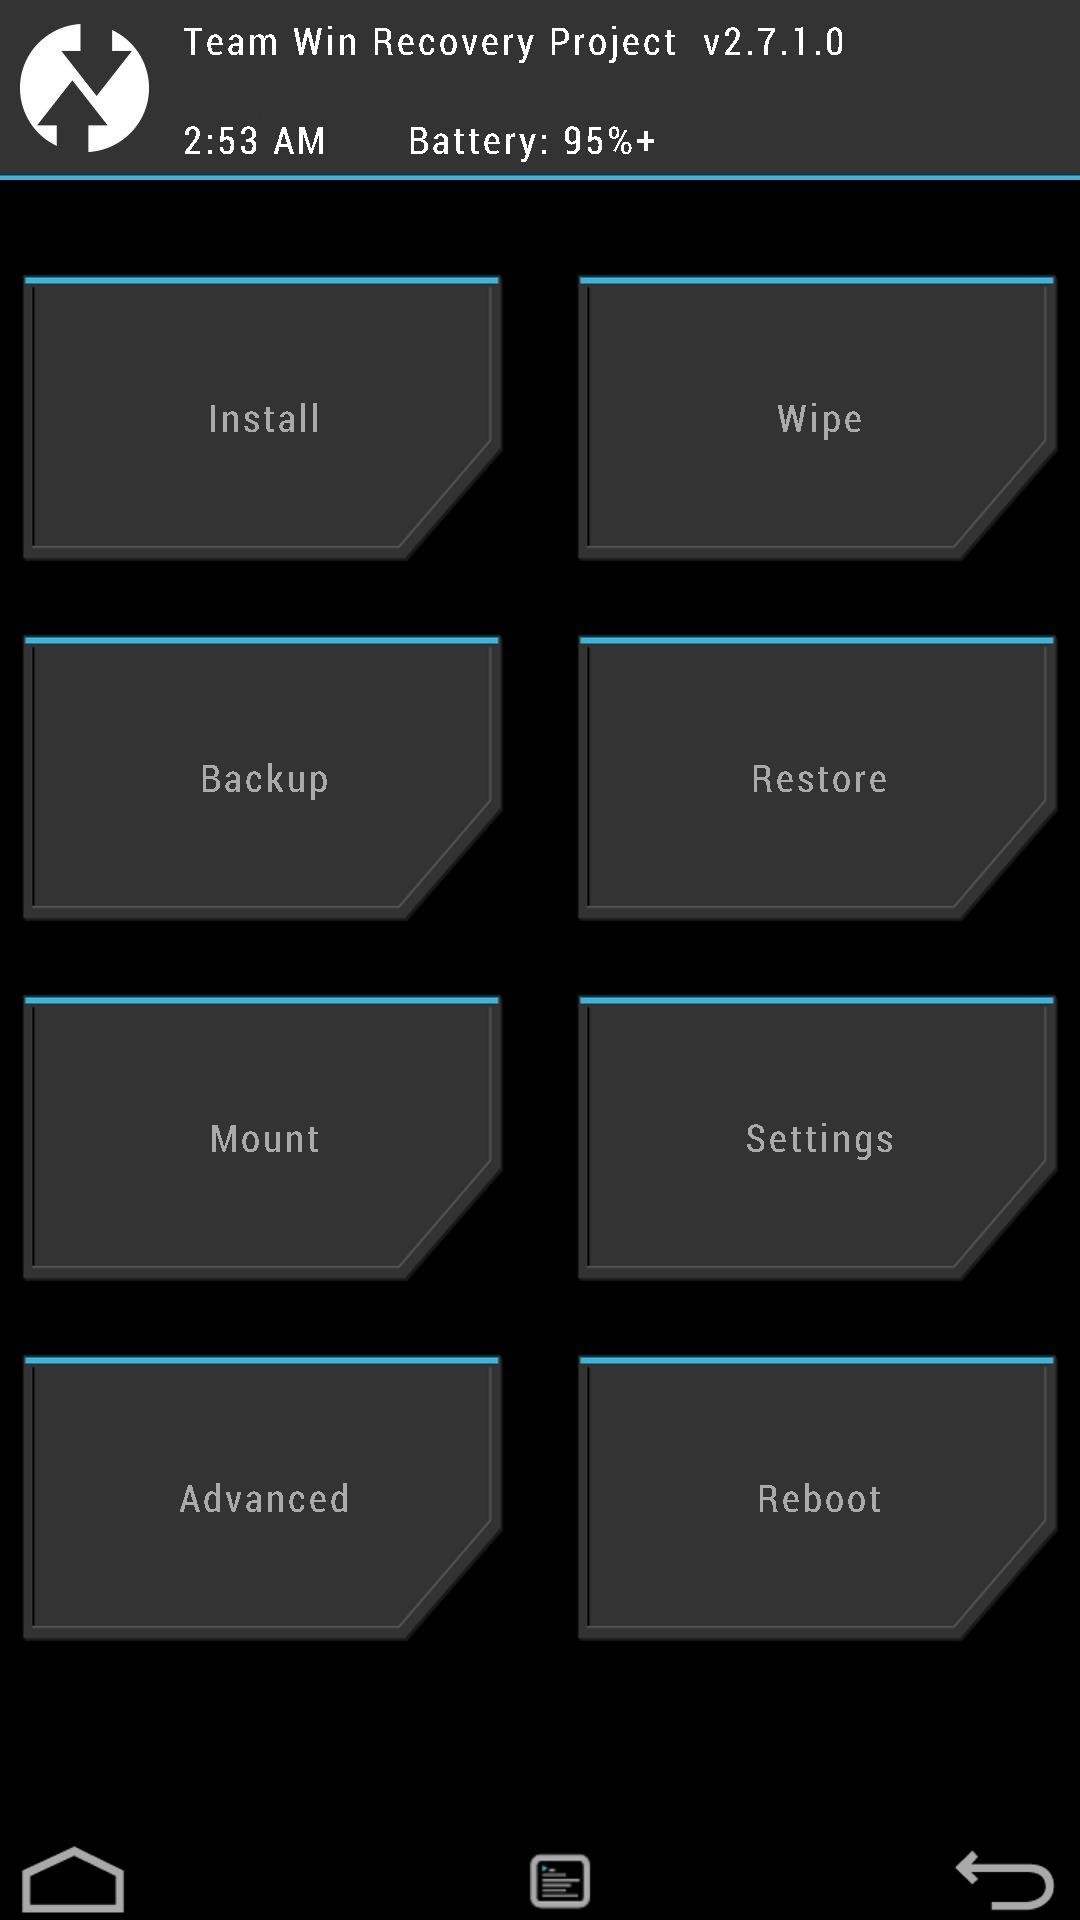
Team Win Recovery Project (also known as TWRP) is the recovery of choice for most Android modders. It's fast, stable, and has an easy-to-use touch interface. Thanks to Team Win, you'll be installing new ROMs and creating full backups in no time!
Step 2: Use TWRP Manager to Install a Recovery
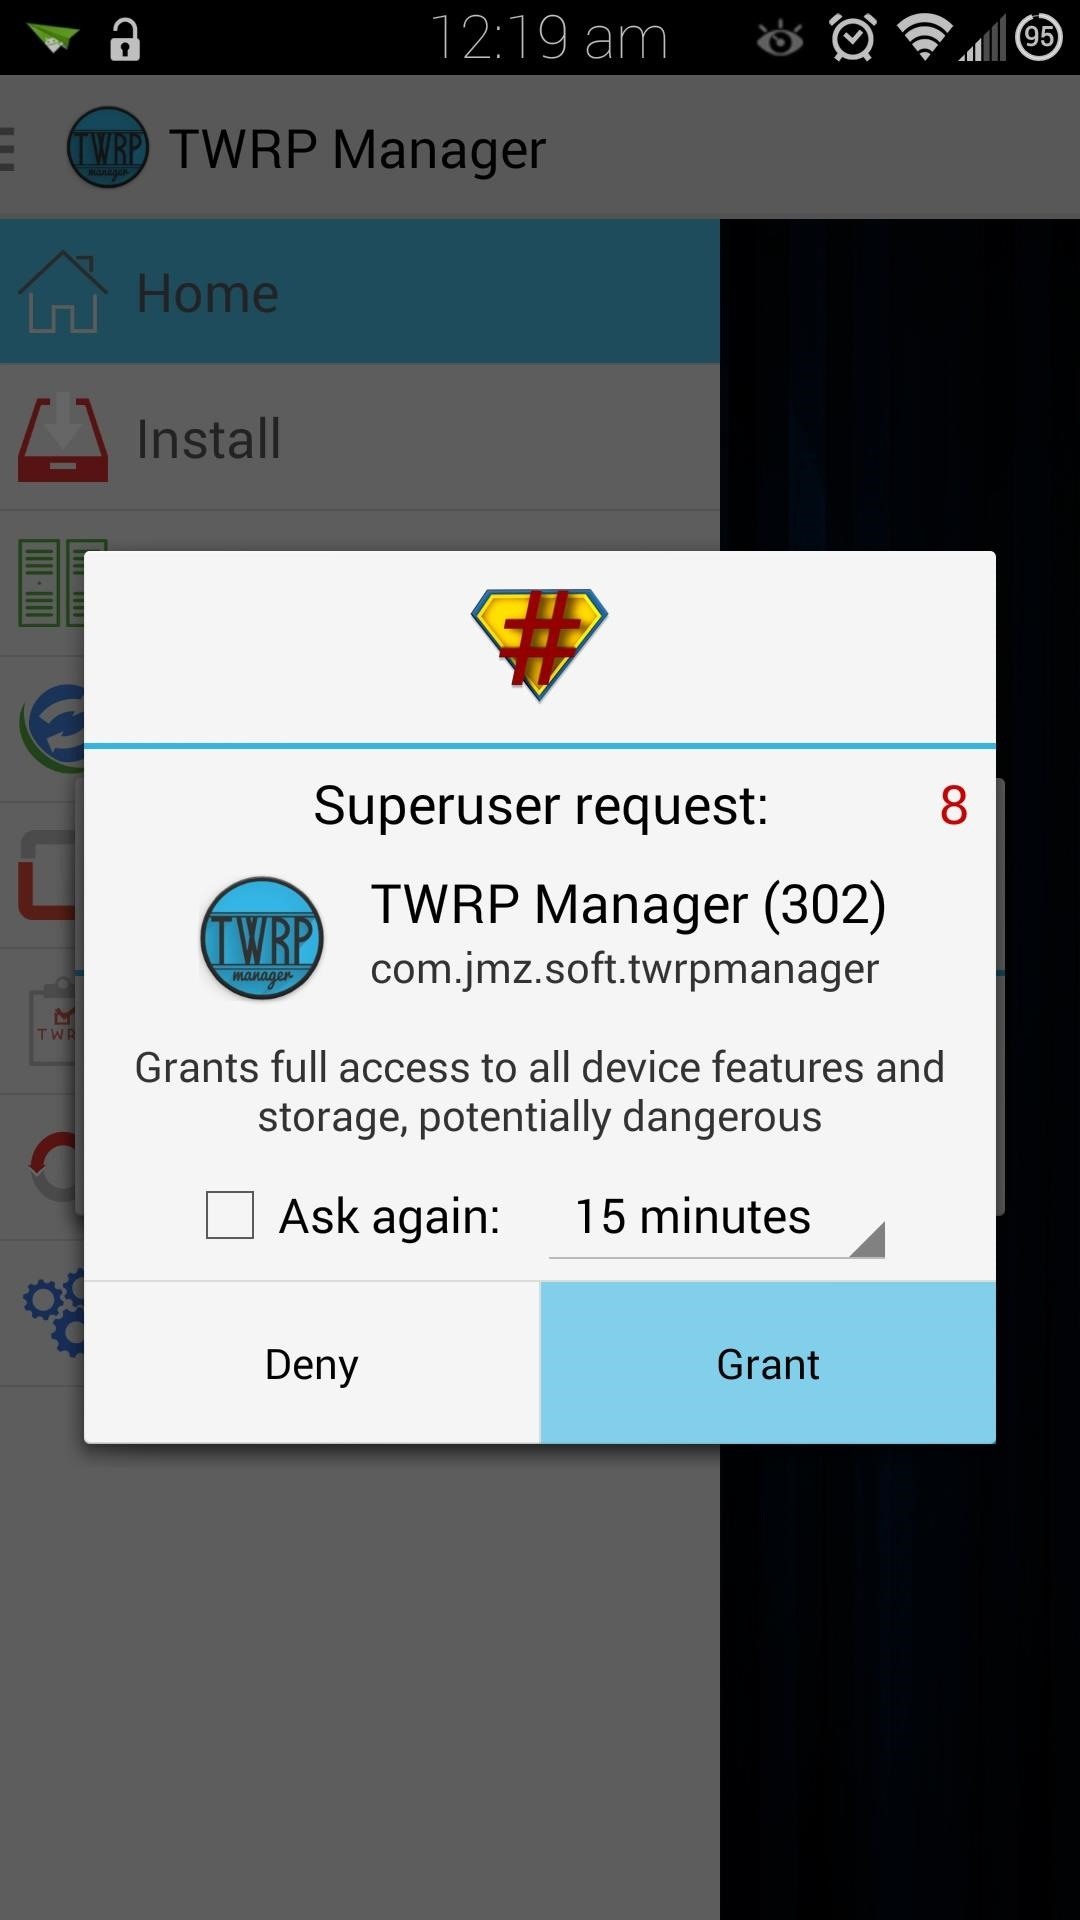
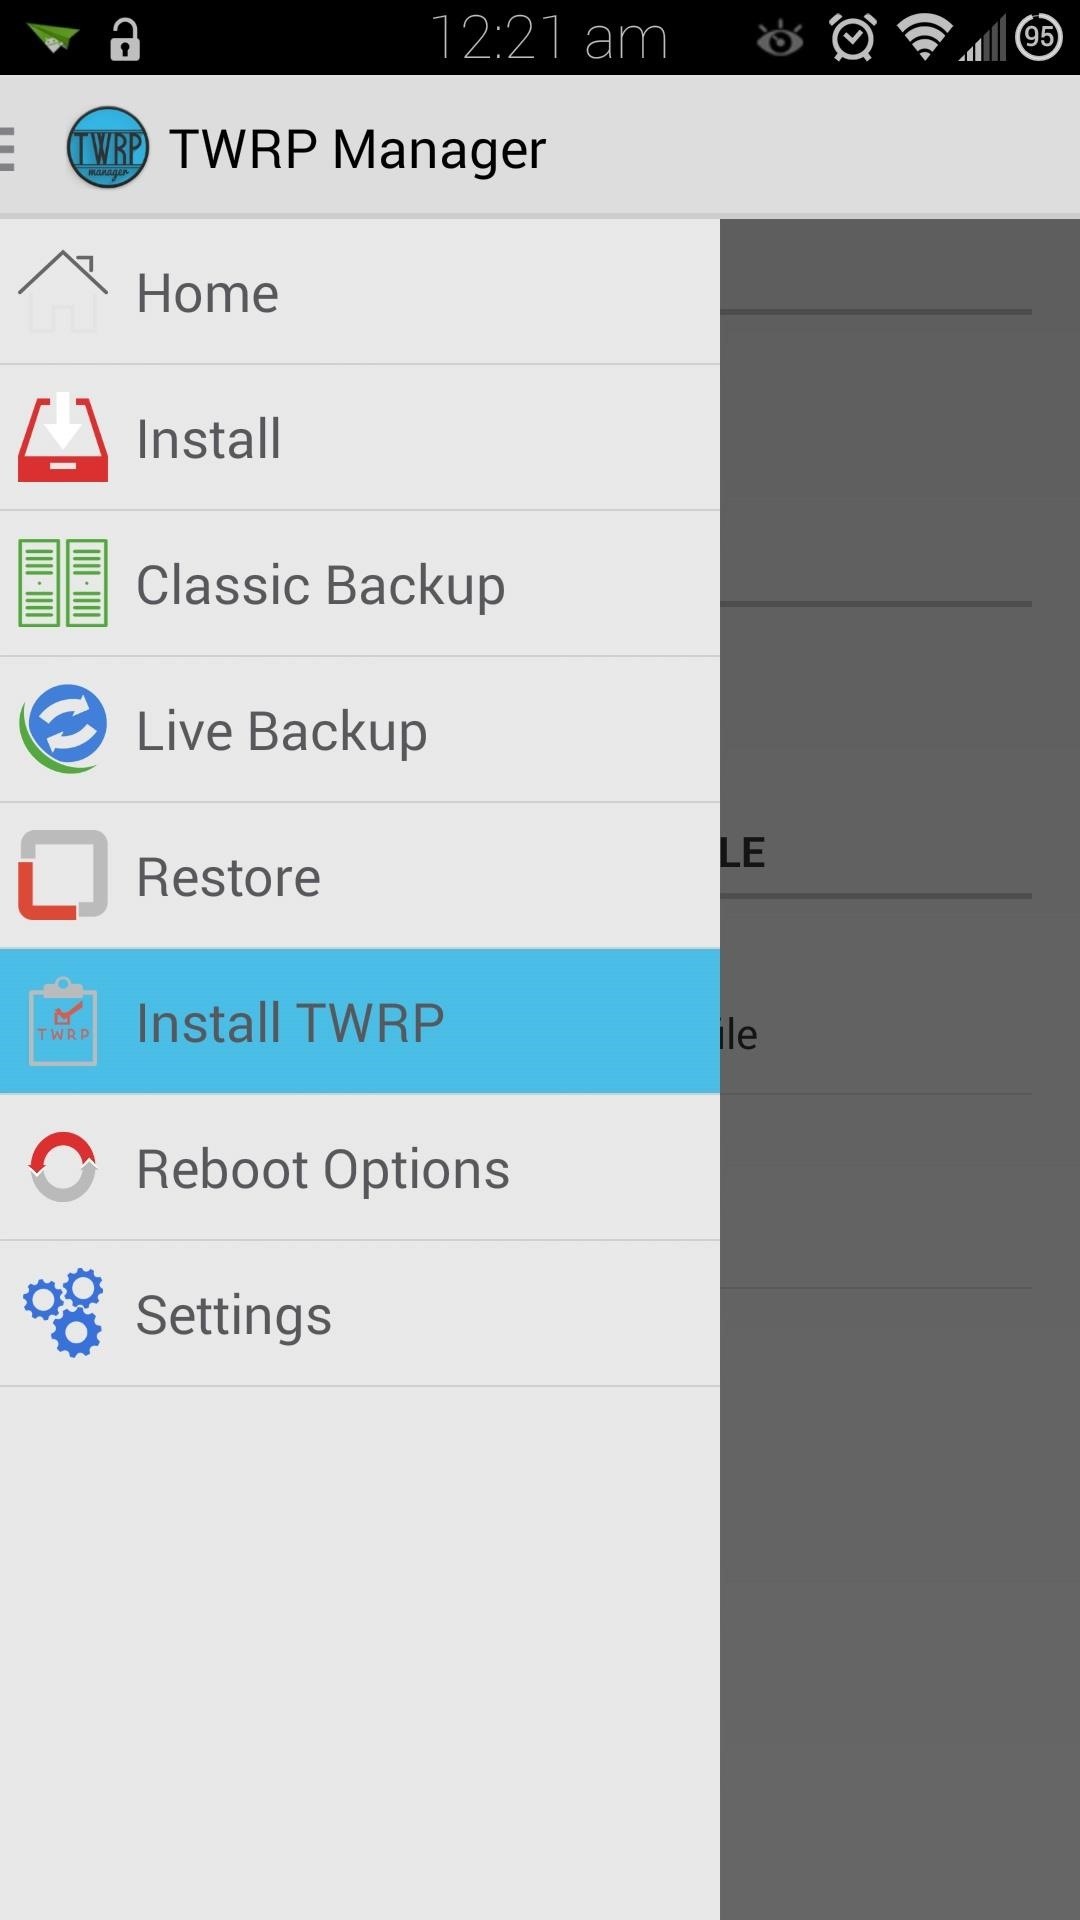
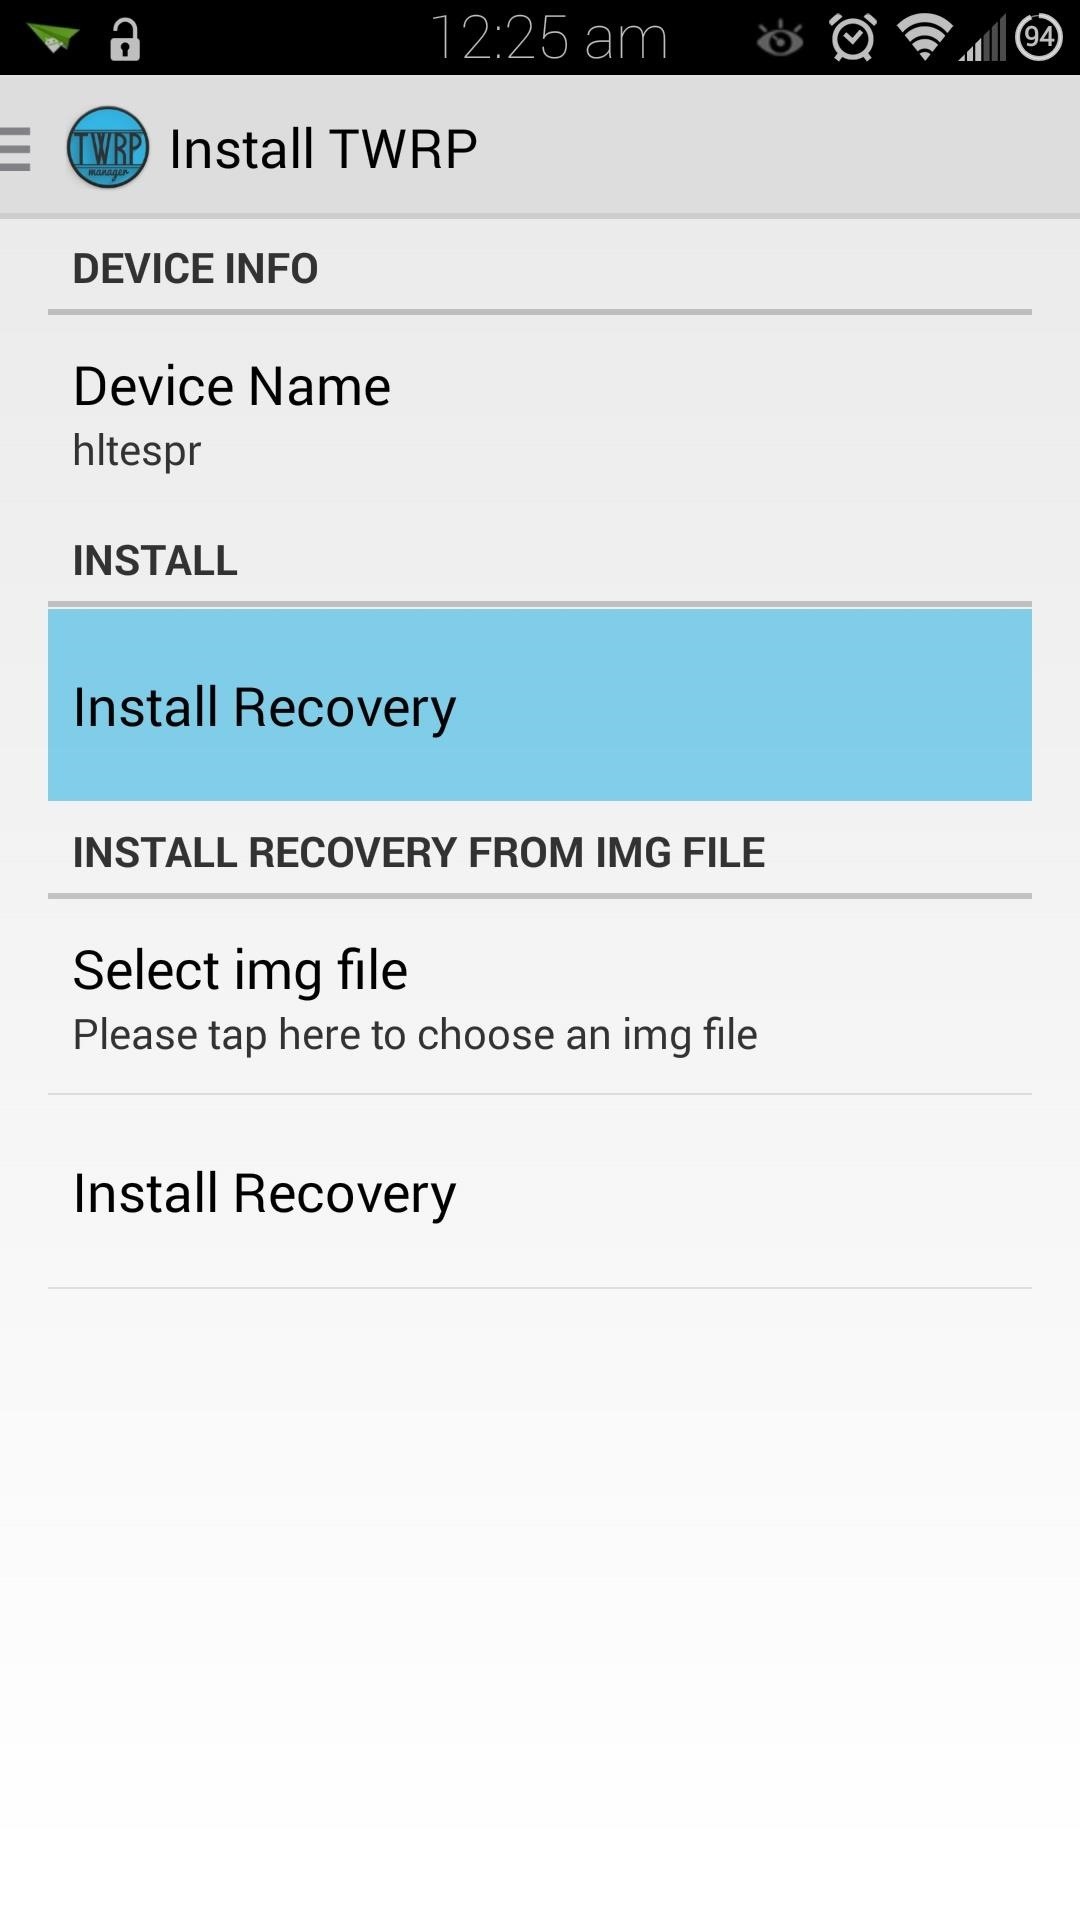
Open up TWRP Manager and grant it superuser access, then tap on Install TWRP from the left-hand menu.
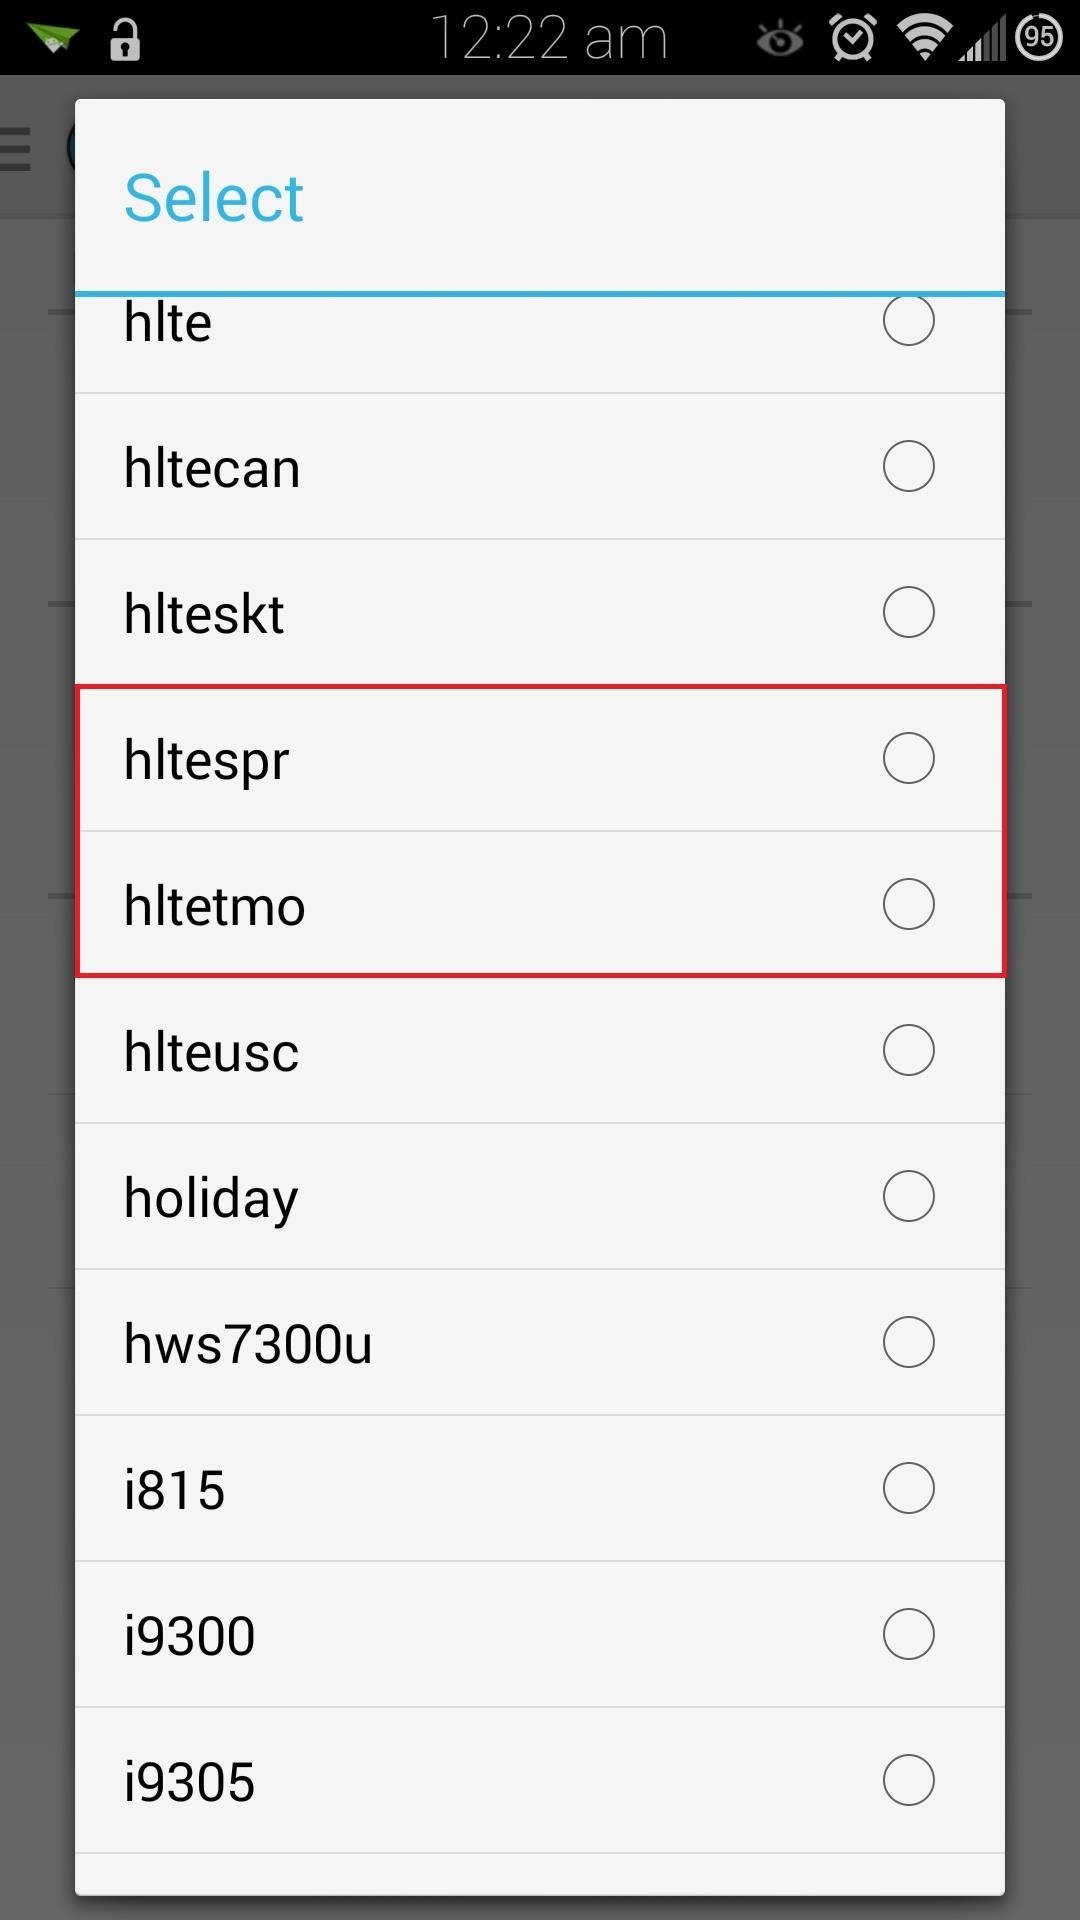
You'll need to select the correct, carrier-specific version of TWRP to install, so tap on Device Name. If you have the Sprint variant of the Note 3, then select hltespr. If you're on T-Mobile, select hltetmo.
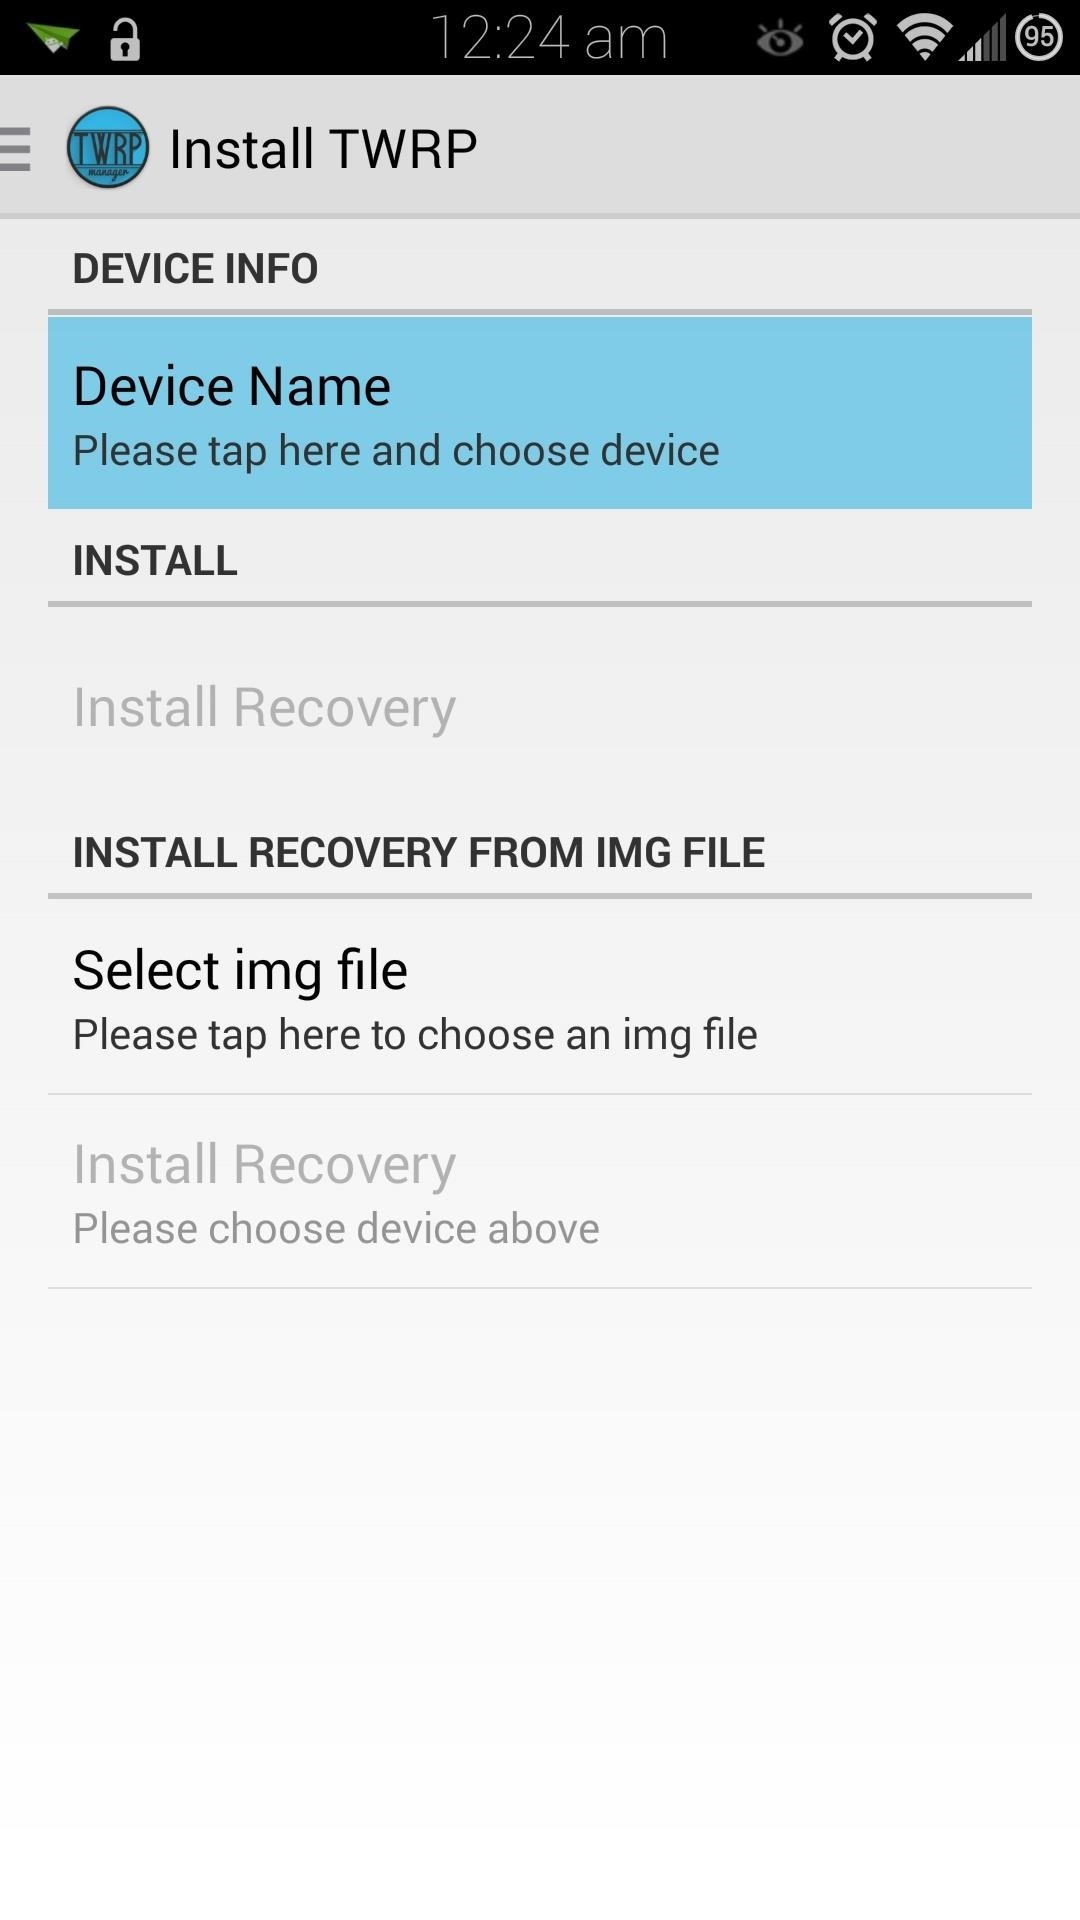
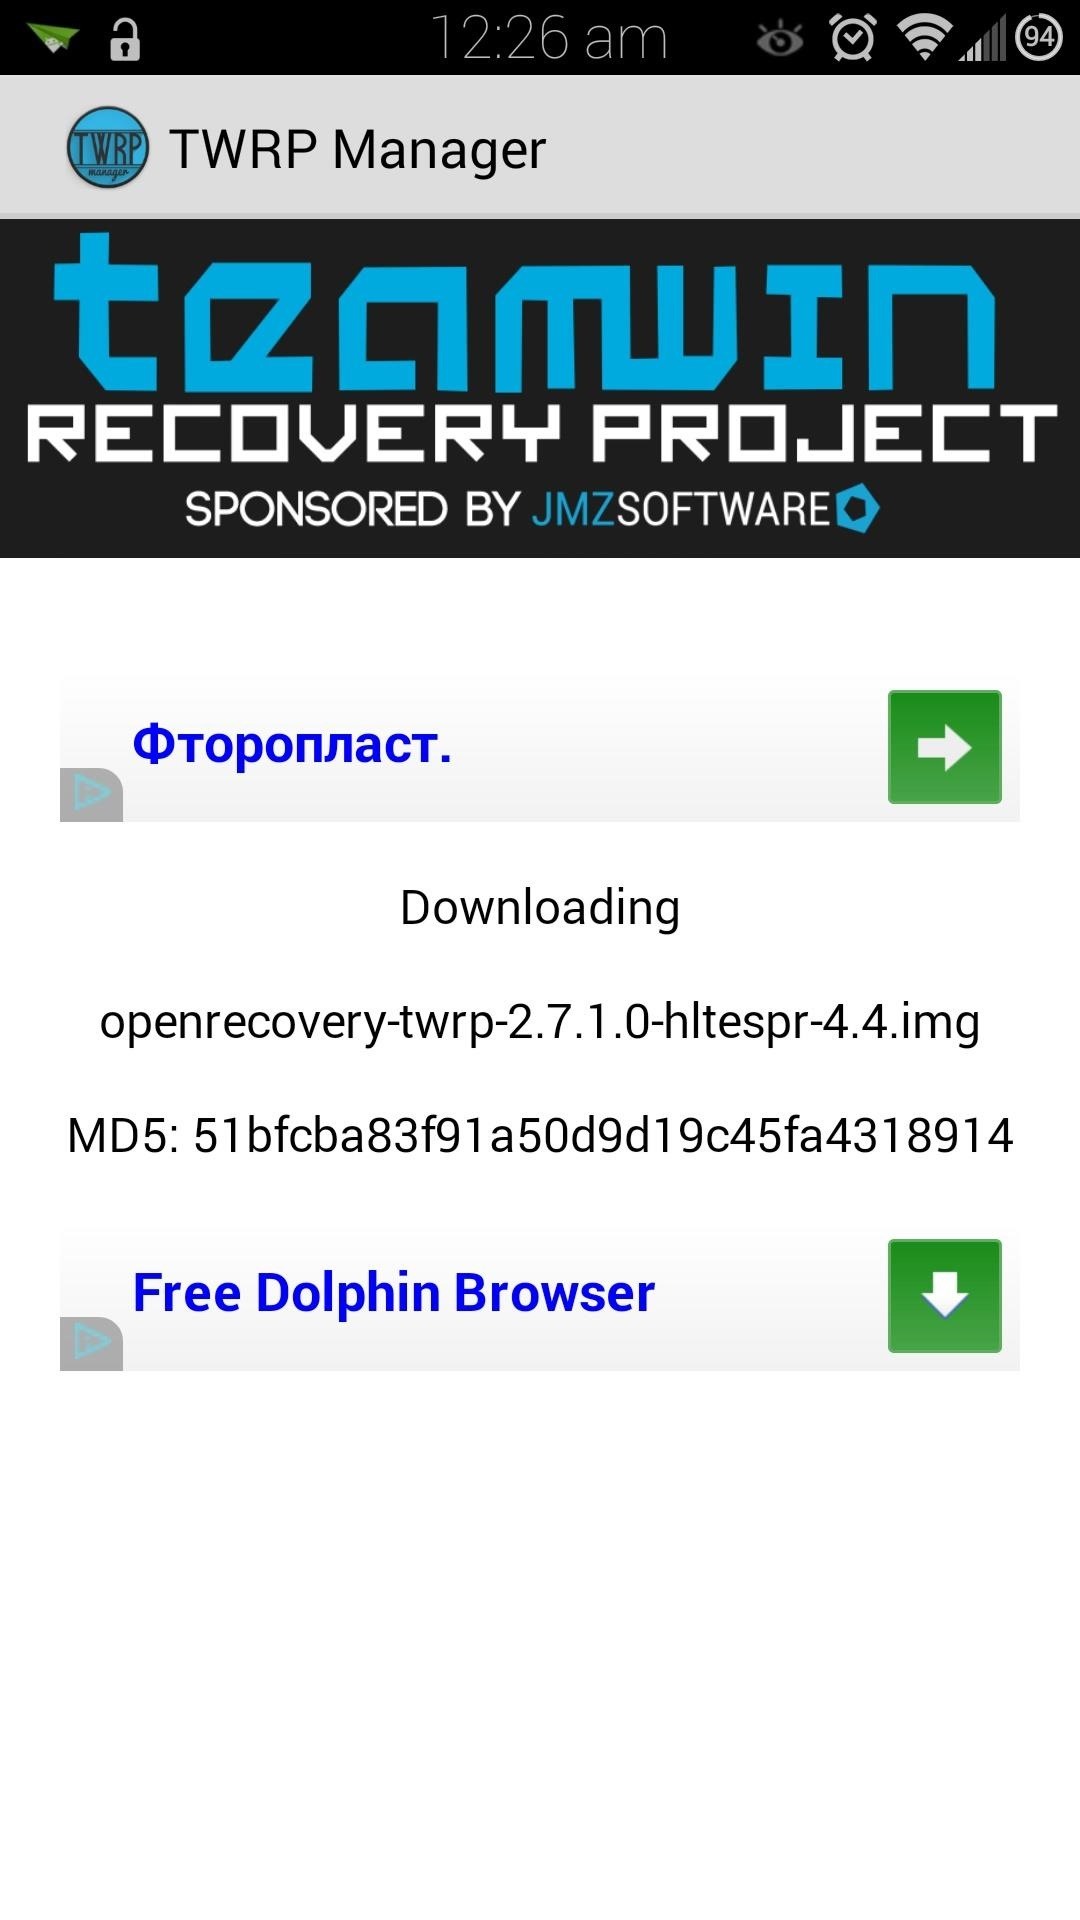
Now tap on Install Recovery, which will start downloading the .img file. You may get a warning asking you to verify what partition the recovery should be installed on. The partition listed should look like this:
/dev/block/platform/msm_sdcc.1/by-name/recovery
Confirm by tapping Yes at the popup.

It should take just a few seconds, then you'll officially have a custom recovery!

Step 3: Boot into Your New Recovery
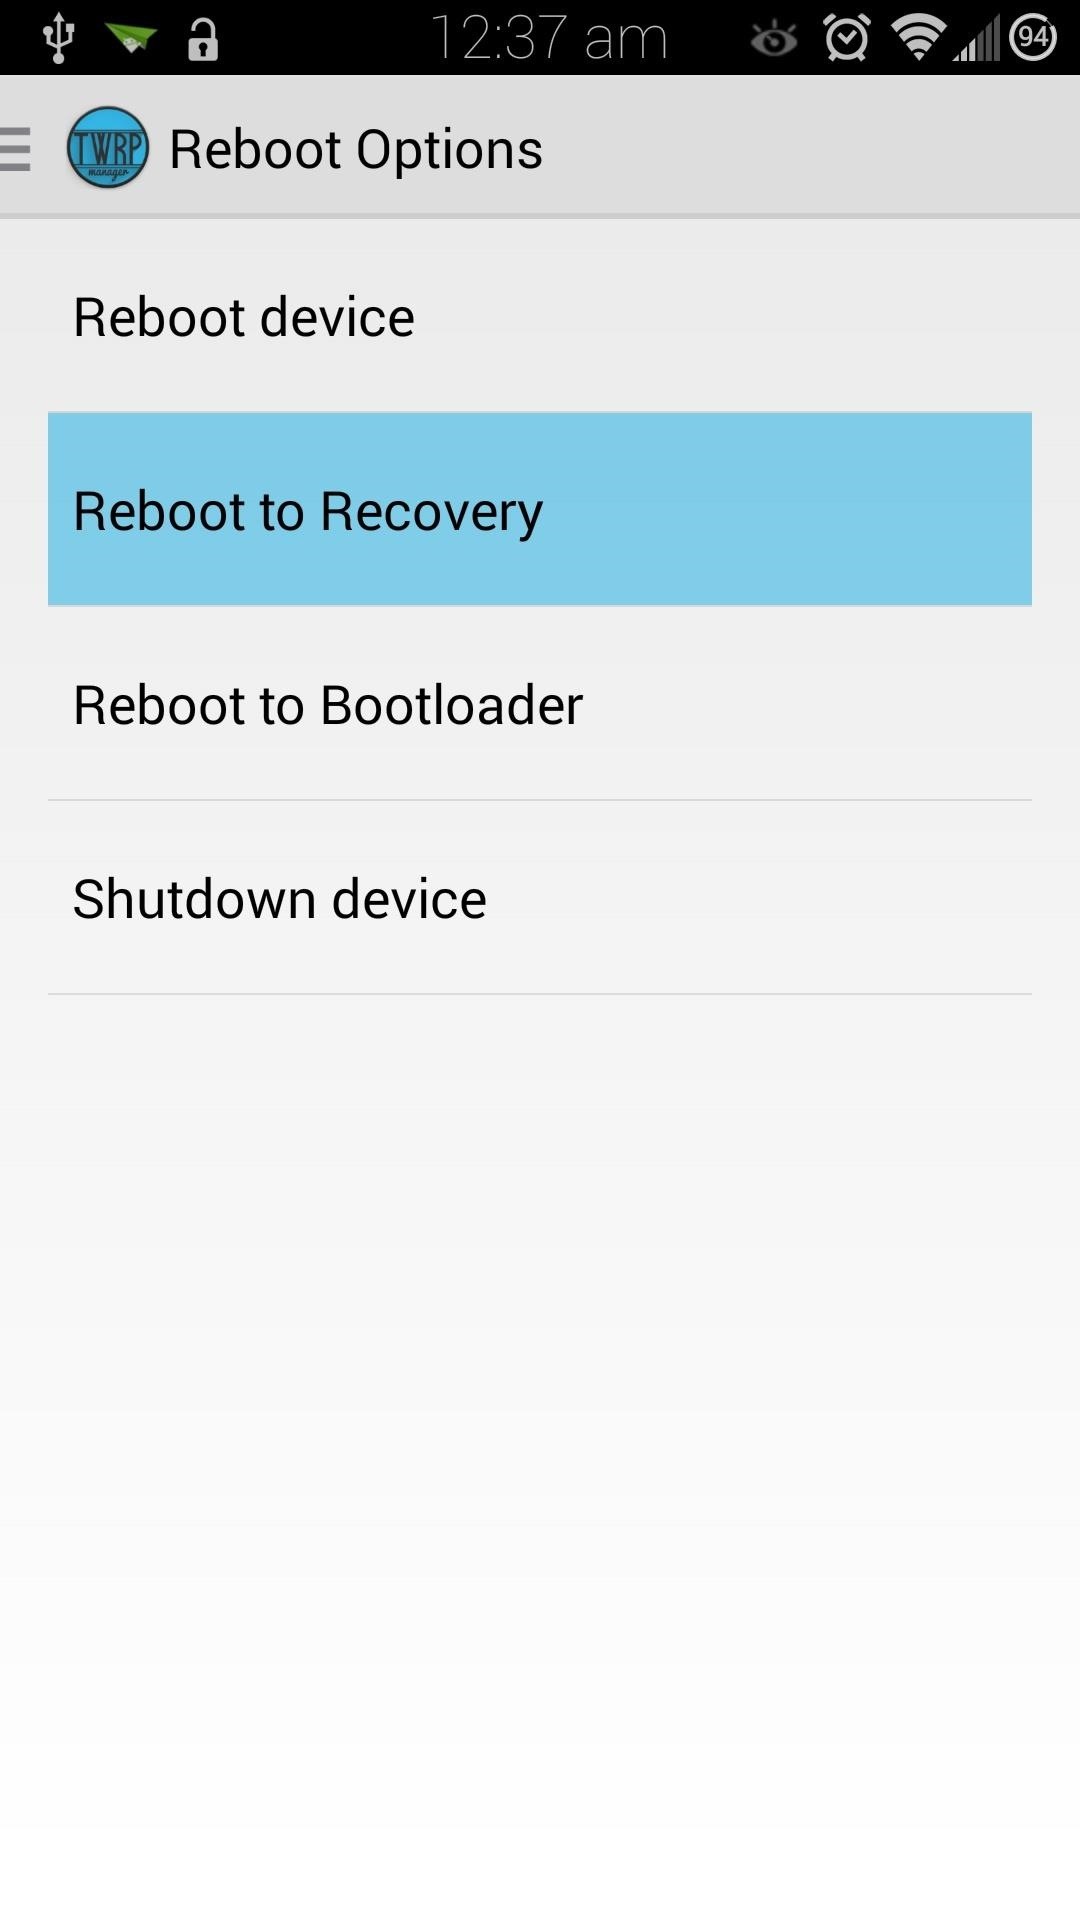
There are several ways to boot into recovery. First, from TWRP Manager, you can select Reboot Options from the menu, then tap on Reboot to Recovery.
Alternatively, you can power off your device, then power it back on by holding the Power, Home, and Volume Up keys simultaneously. As soon as you see the words Recovery booting in blue, let go of those three buttons.
You can also use an app called Quick Boot to add this option to your device—check out "Option #3" is Dallas' guide here.
Using TWRP to Flash Custom ROMs
Now that you have a custom recovery on your Note 3, you have the power to flash custom ROMs, such as CyanogenMod. Before you get into ROM-flashing, though, you'll need to get into the habit of doing a few things.
Step 1: Create (And Restore) Nandroid Backups
Just in case something goes wrong, like a bad .zip file getting flashed, or you simply don't like the ROM you installed, you'll need a proper backup to revert to. You can create a full nandroid backup by tapping on Backup. A nandroid is a complete snapshot of everything on your device; the current ROM, your apps, music, text messages, you name it. Not a single byte is left out.

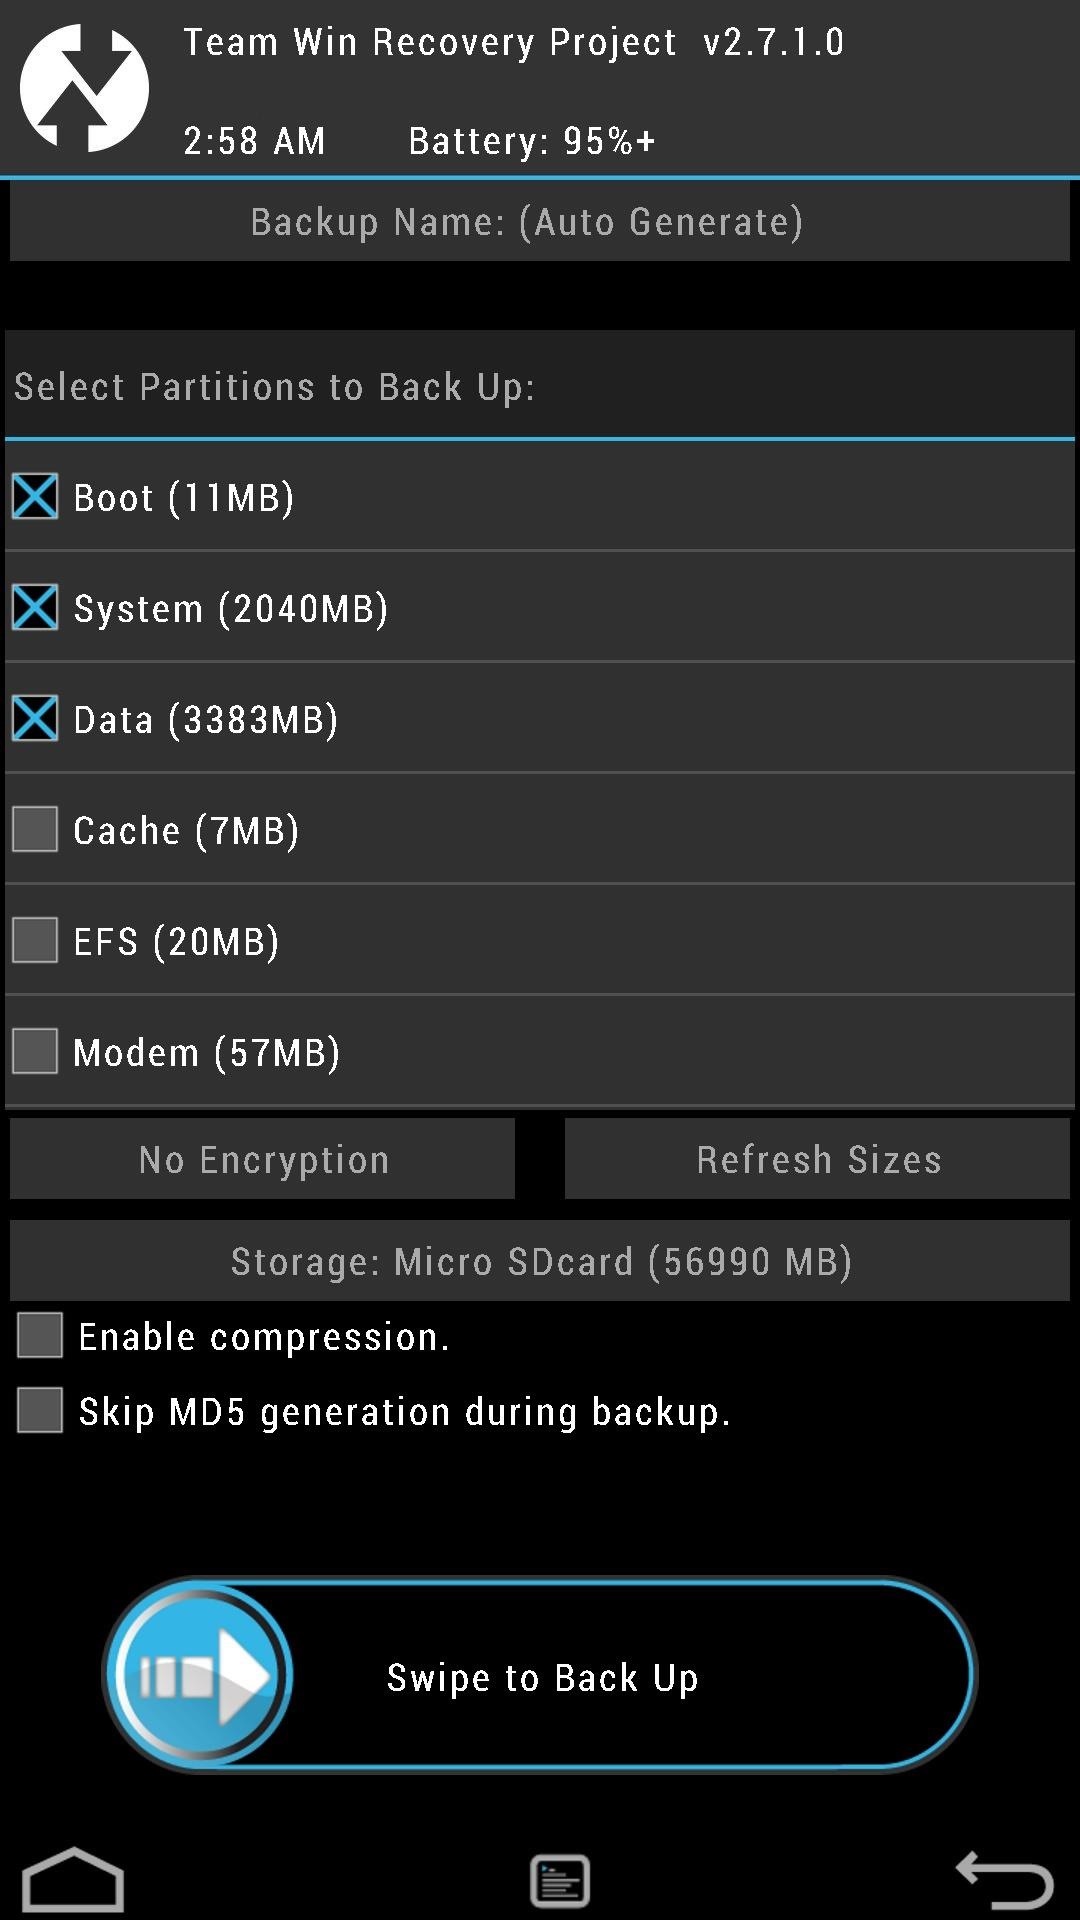
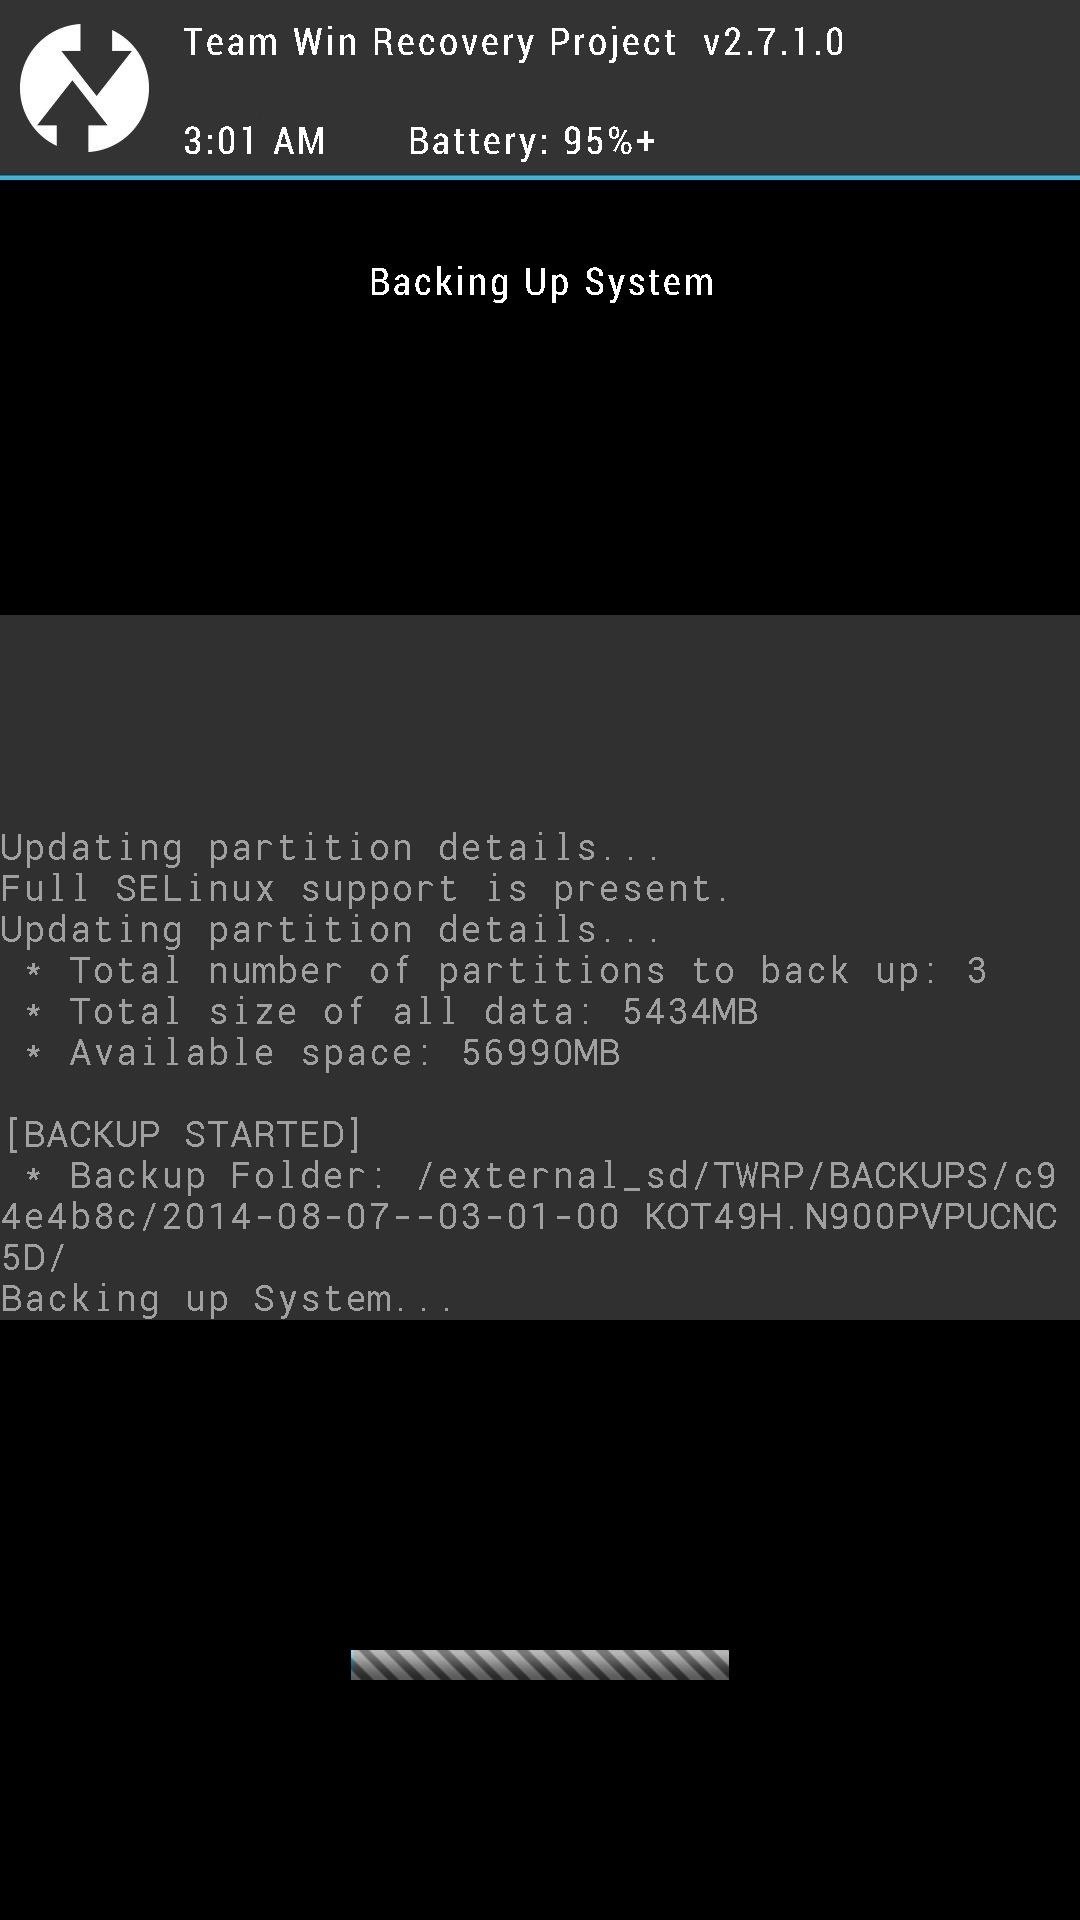
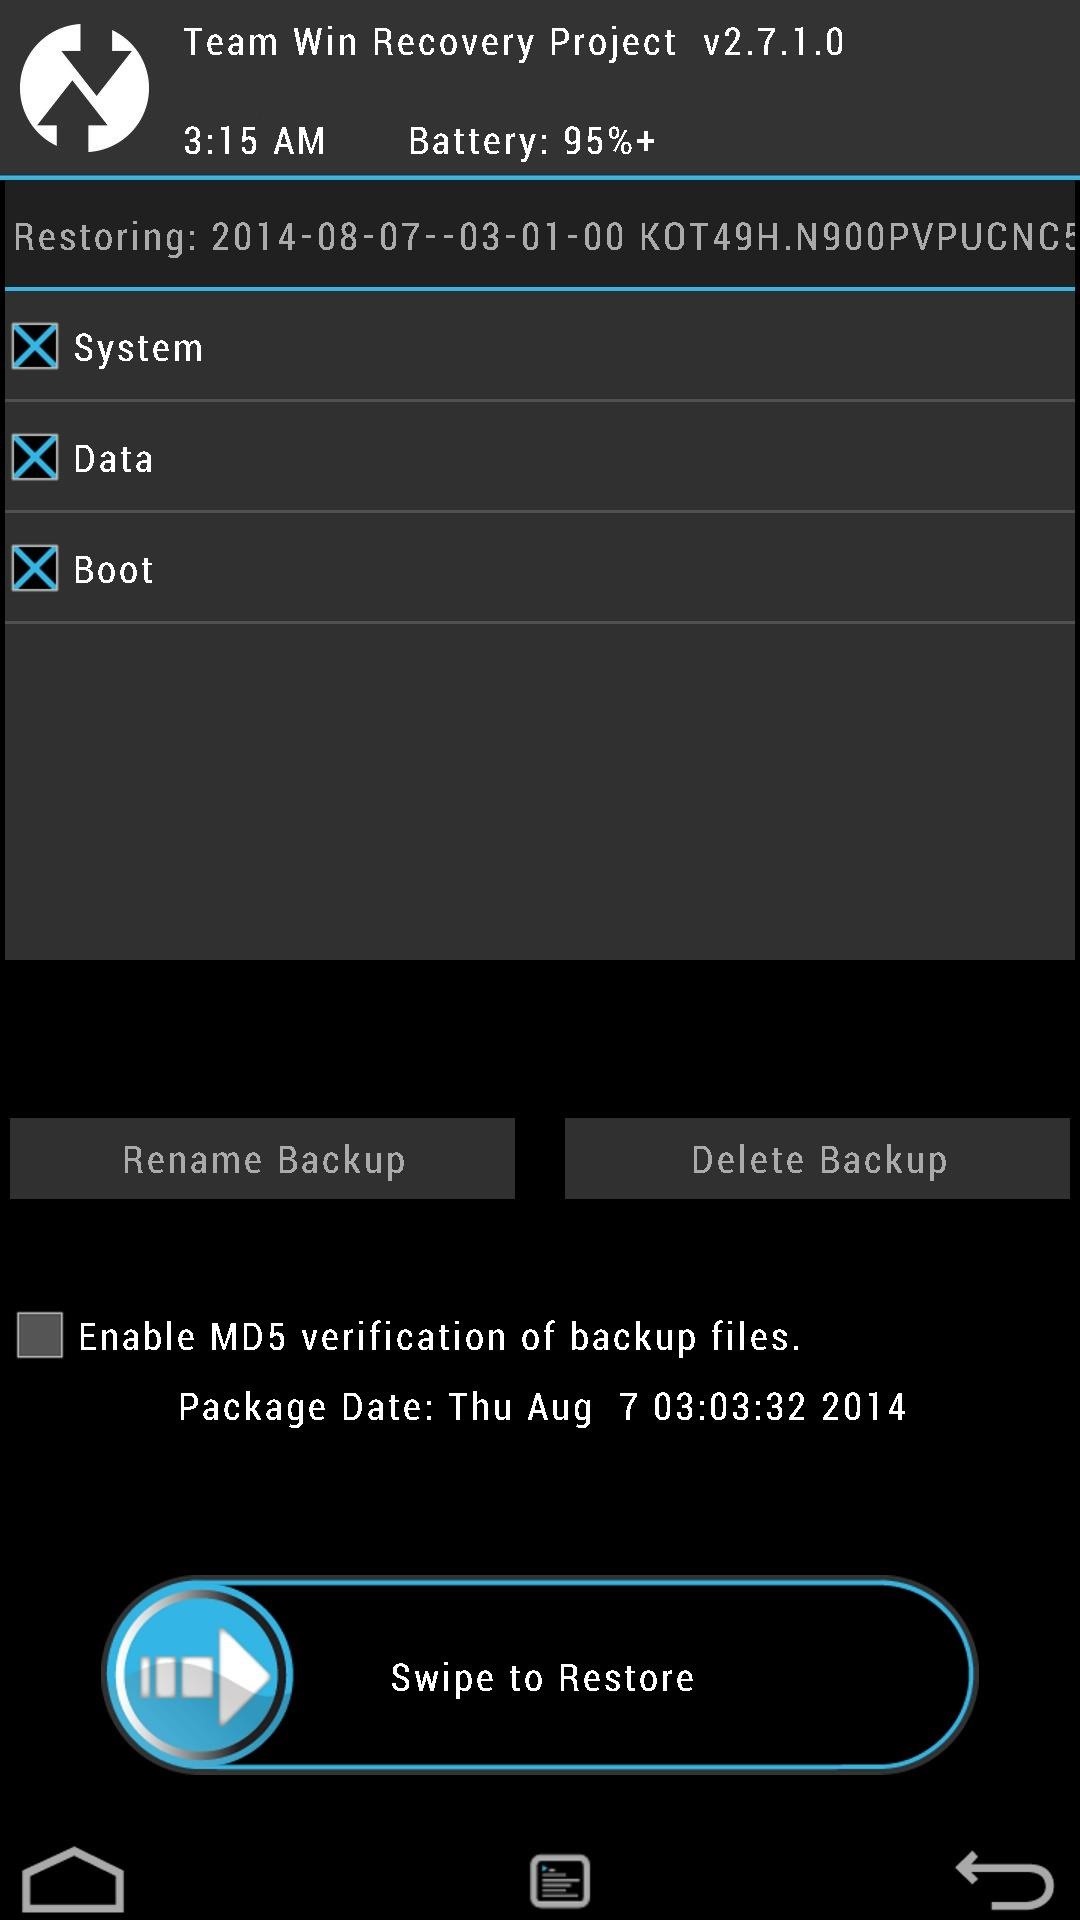
Make sure the boxes next to Boot, System, and Data are all checked. Then slide the Swipe to Back Up button over to the right to make your first nandroid.
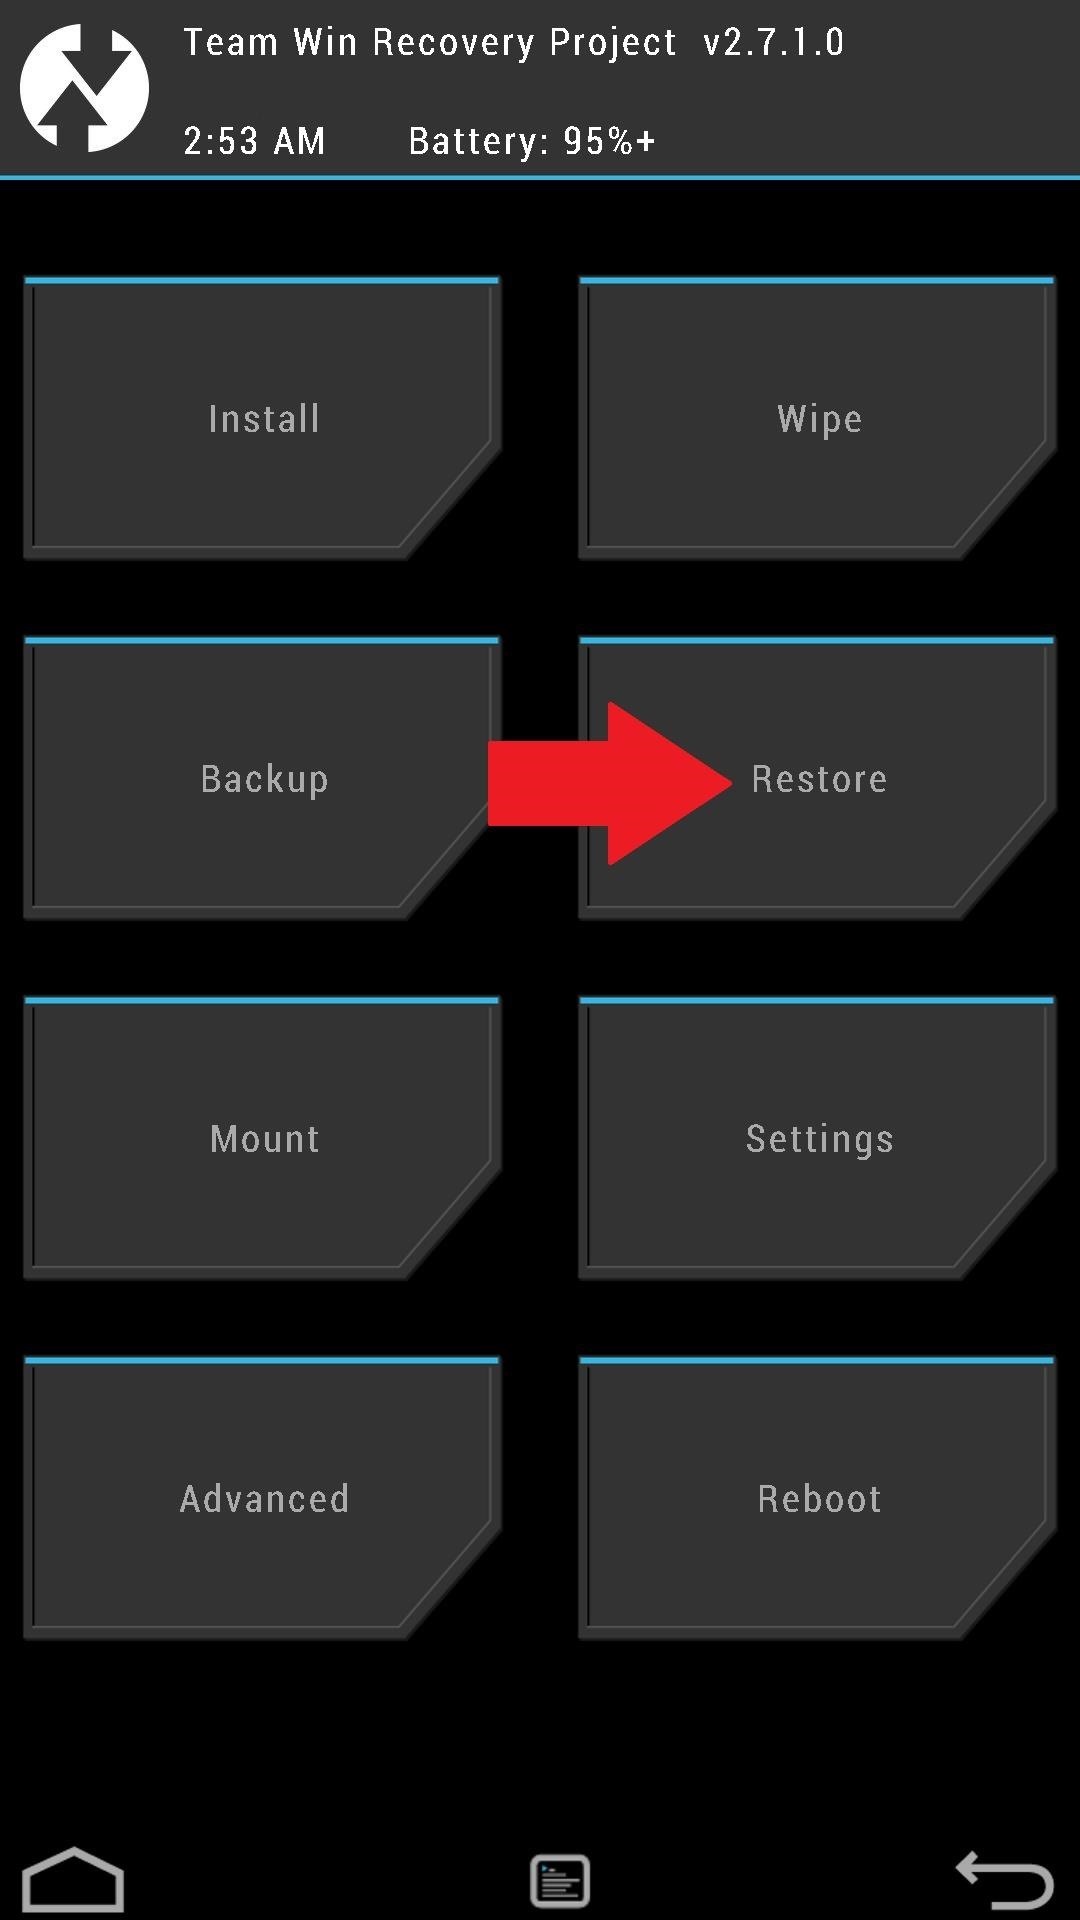
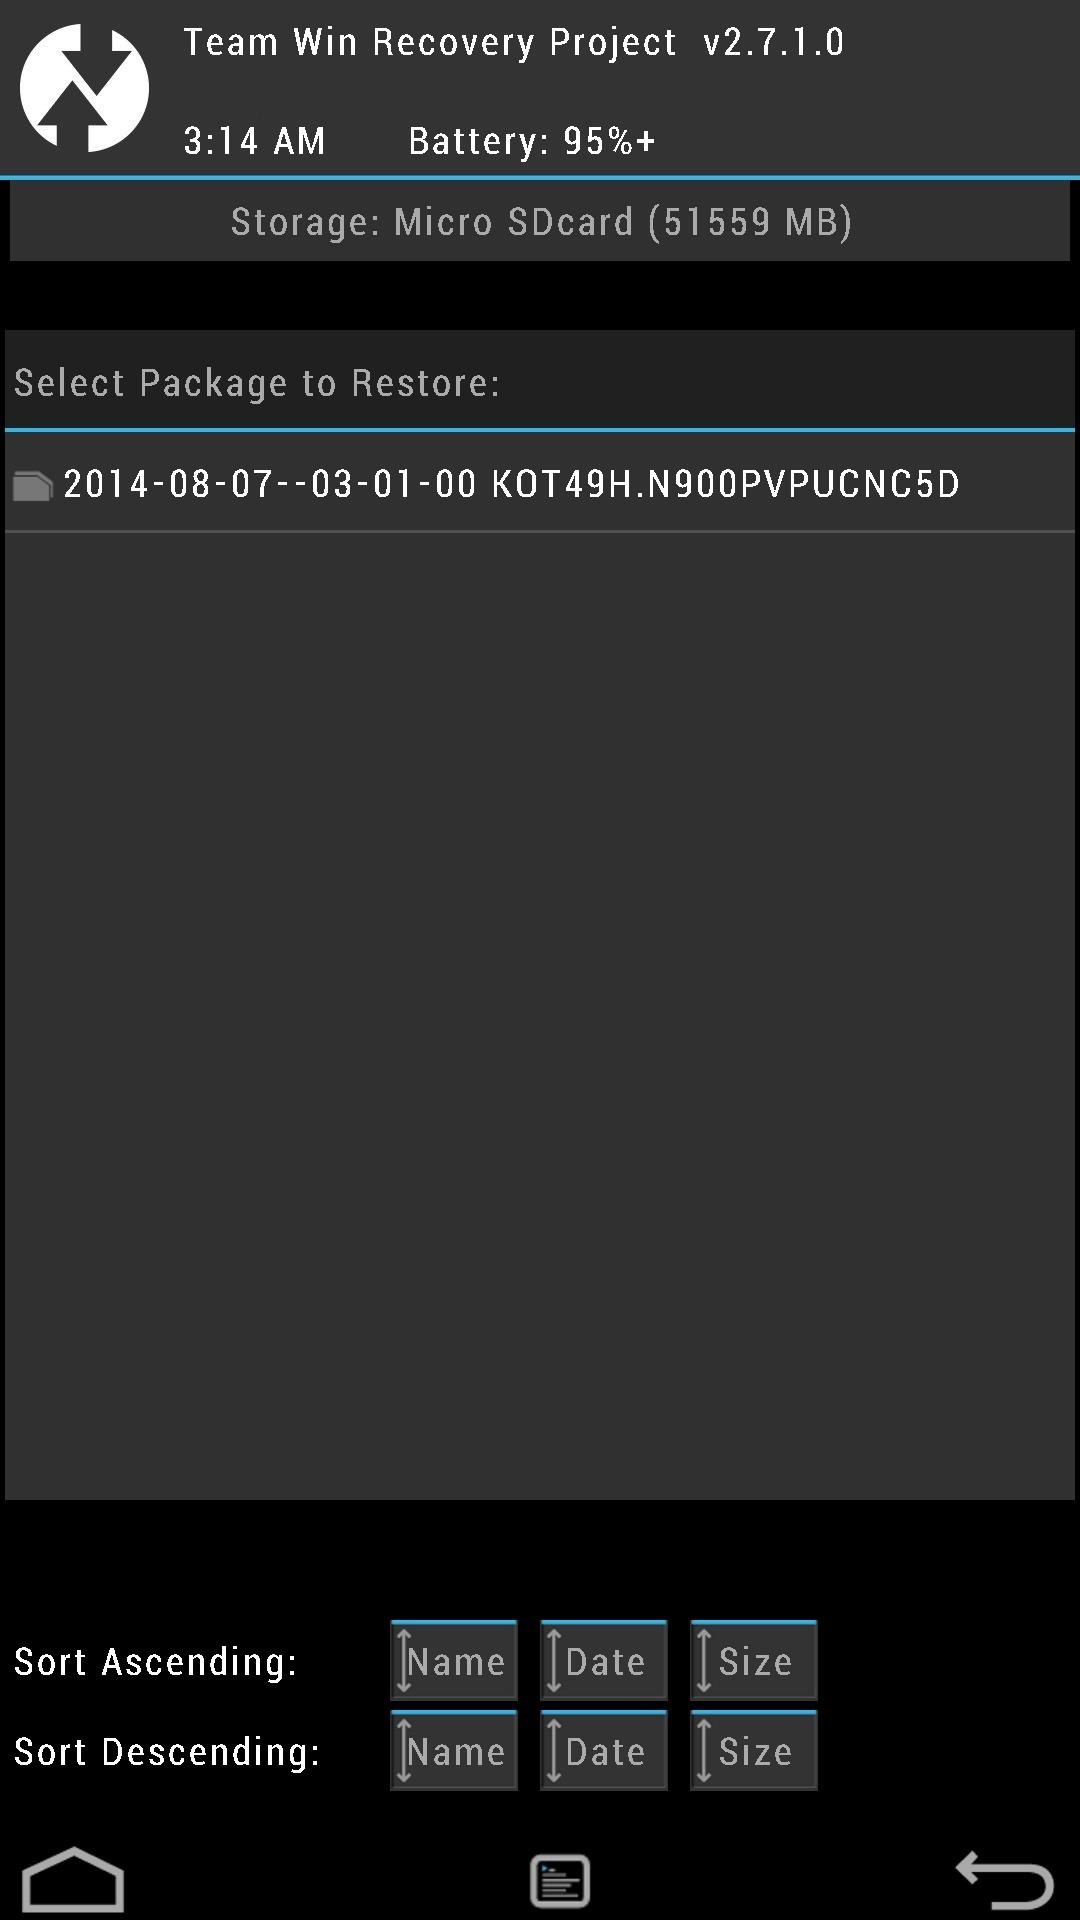
If you ever need to restore it, tap on the Restore button from the main menu. Find your backup (stored on your external SD card), then slide the Swipe to Restore button over to begin restoring it.
Step 2: Wipe Data to Prepare for a New ROM
Before installing a new ROM, you'll need a clean slate to work with. The Wipe option helps you achieve that by clearing out the necessary partitions on your device.
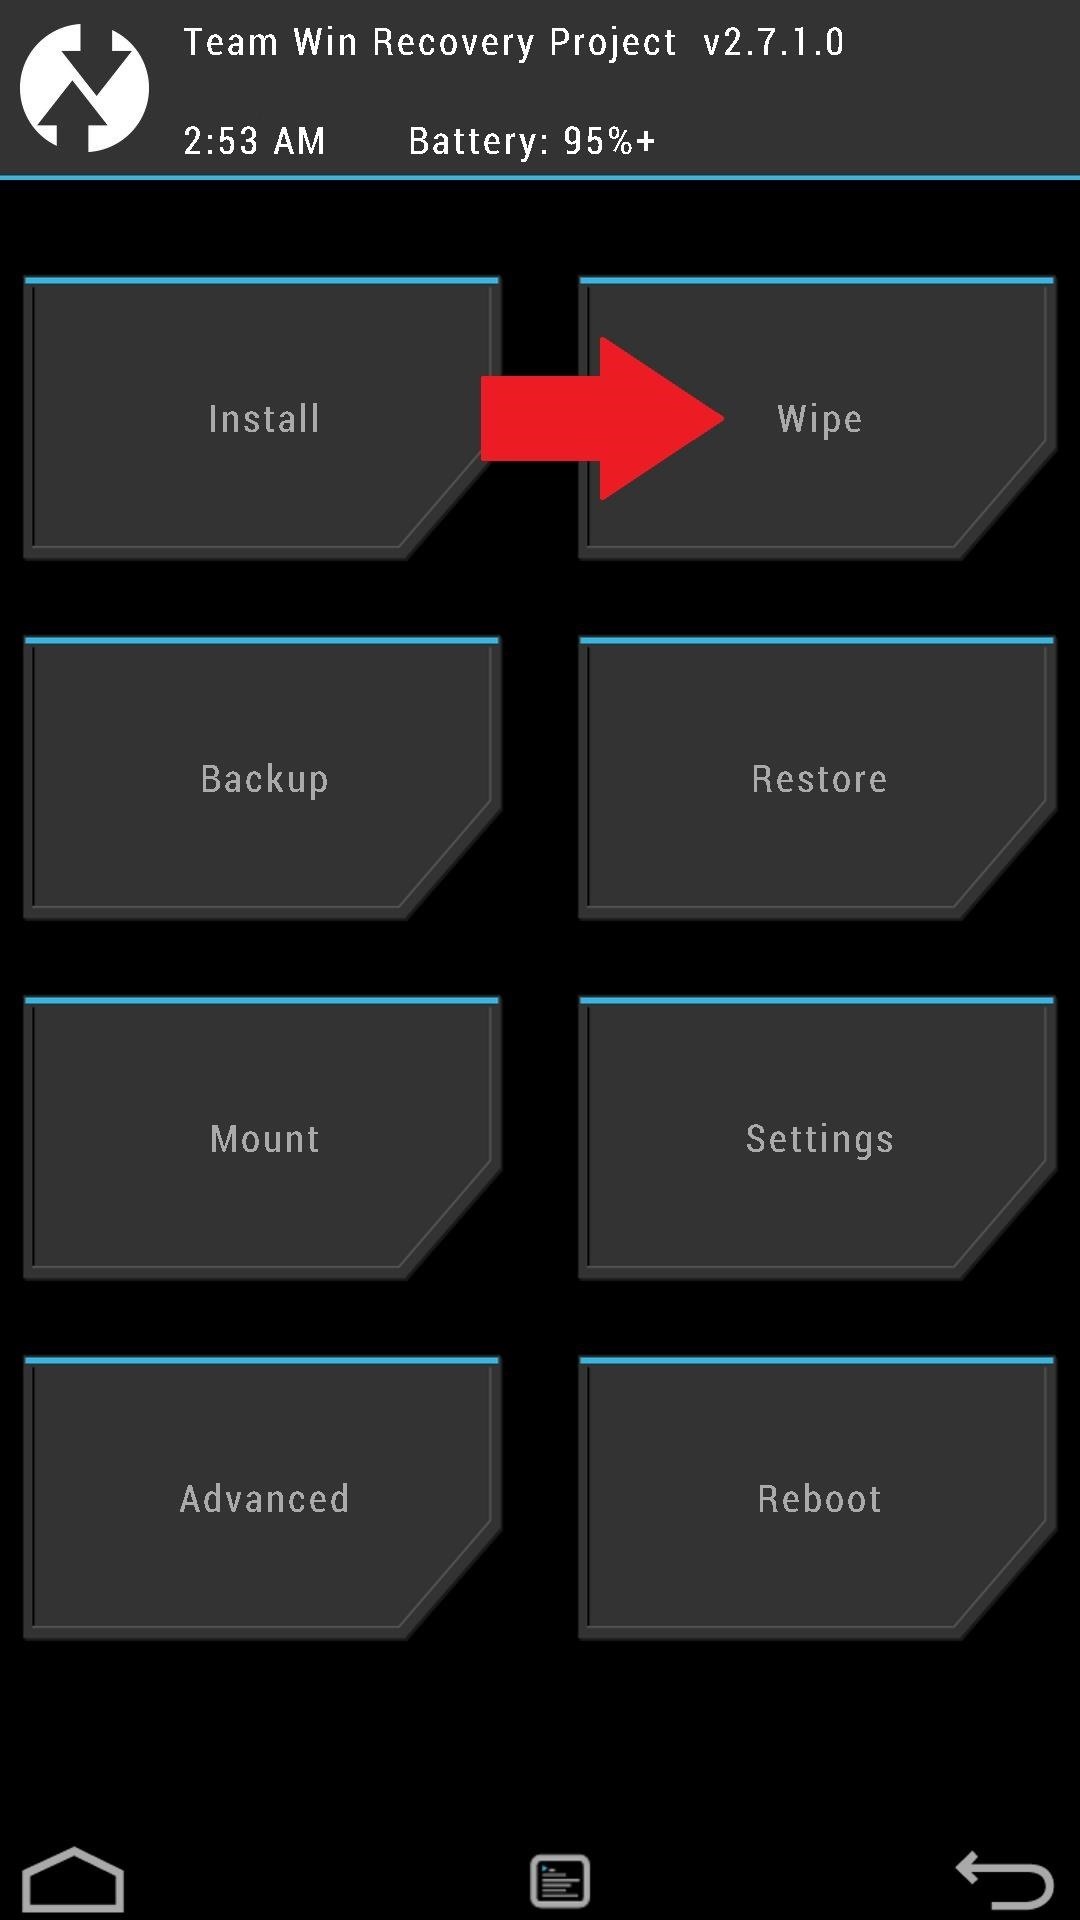

A "Factory Reset" is the standard type of wipe, and is typically all that's needed to prepare for a new ROM. Once you've made a backup and have a custom ROM .zip file on your SD card, you can use the Swipe to Factory Reset button to begin the wipe.
Step 3: Installing ROMs or Mods
Make sure to choose a ROM that's specific to your carrier and device, otherwise you risk bricking it. The XDA forums are a great source for finding ROMs to play around with, so here are some links to get started.
ROMs or mods will come in .zip files, and can be flashed onto your device by tapping Install from the TWRP main menu.
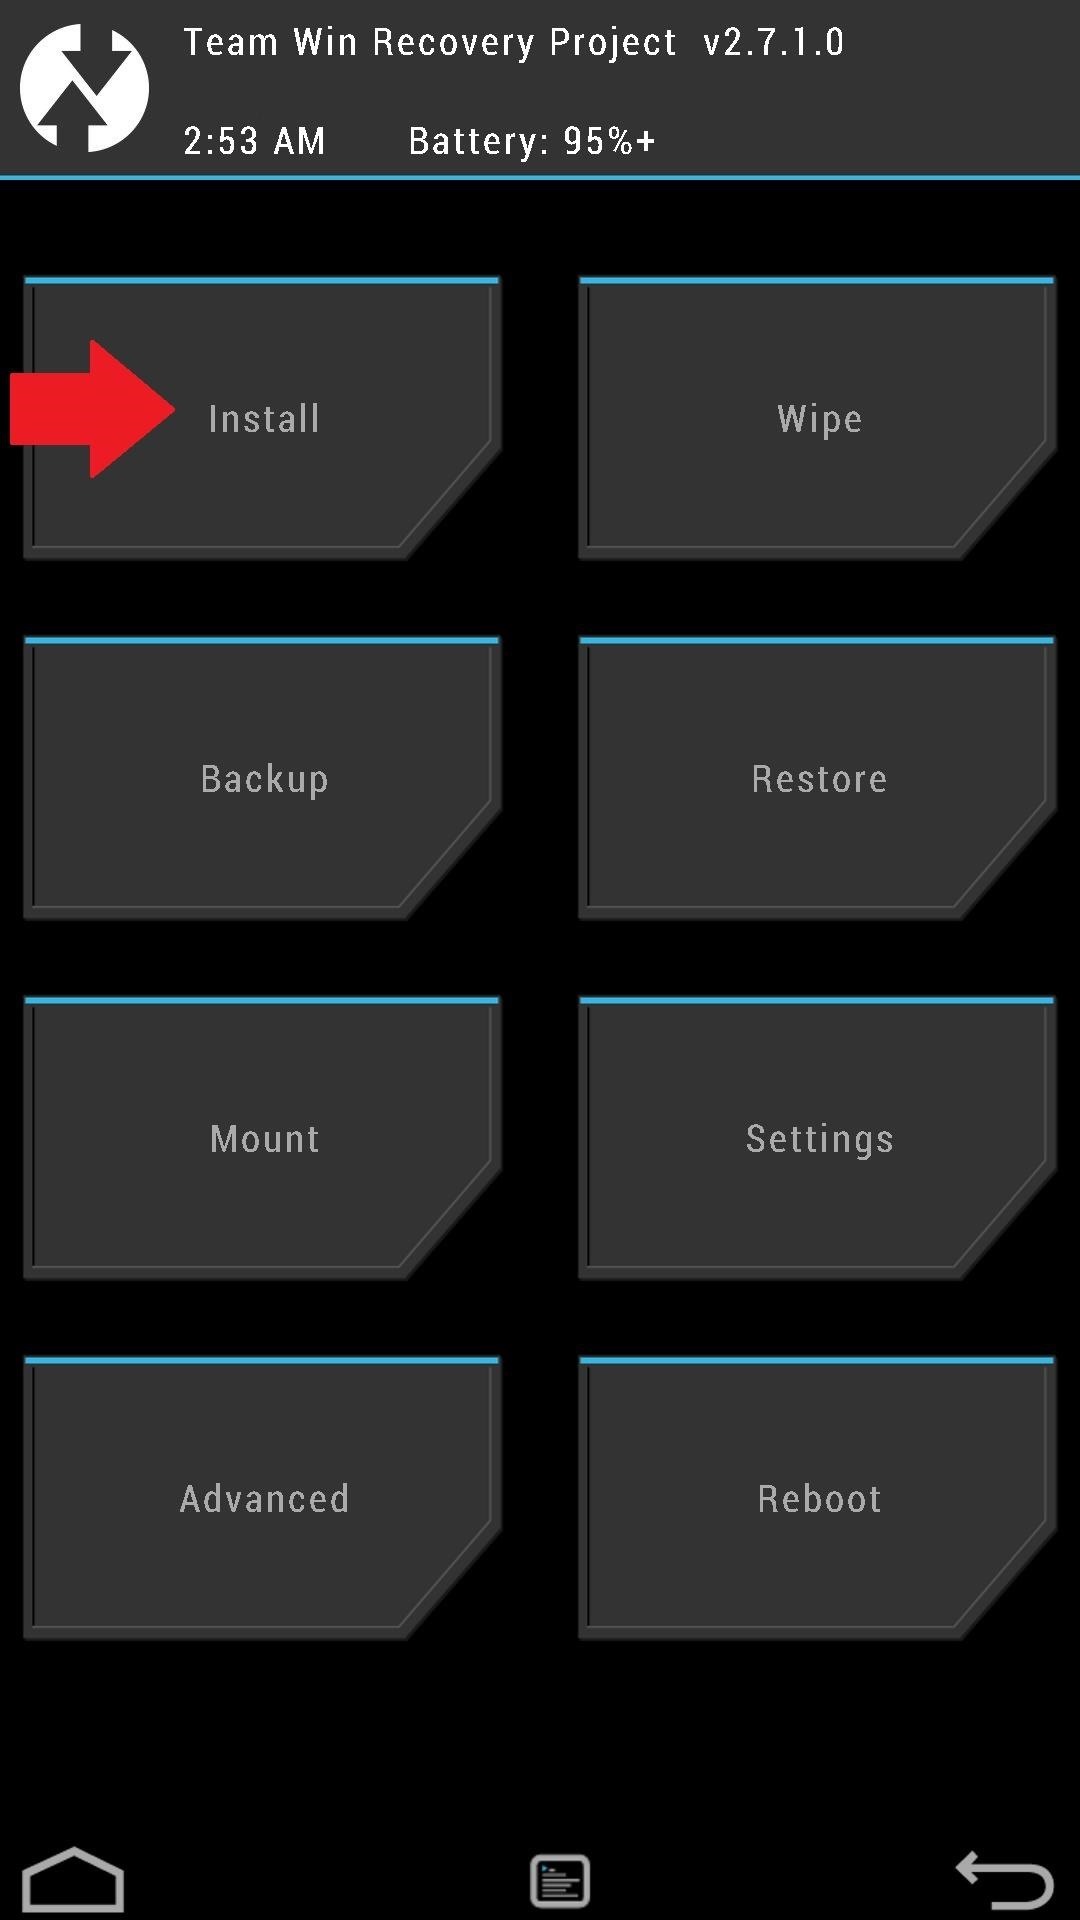
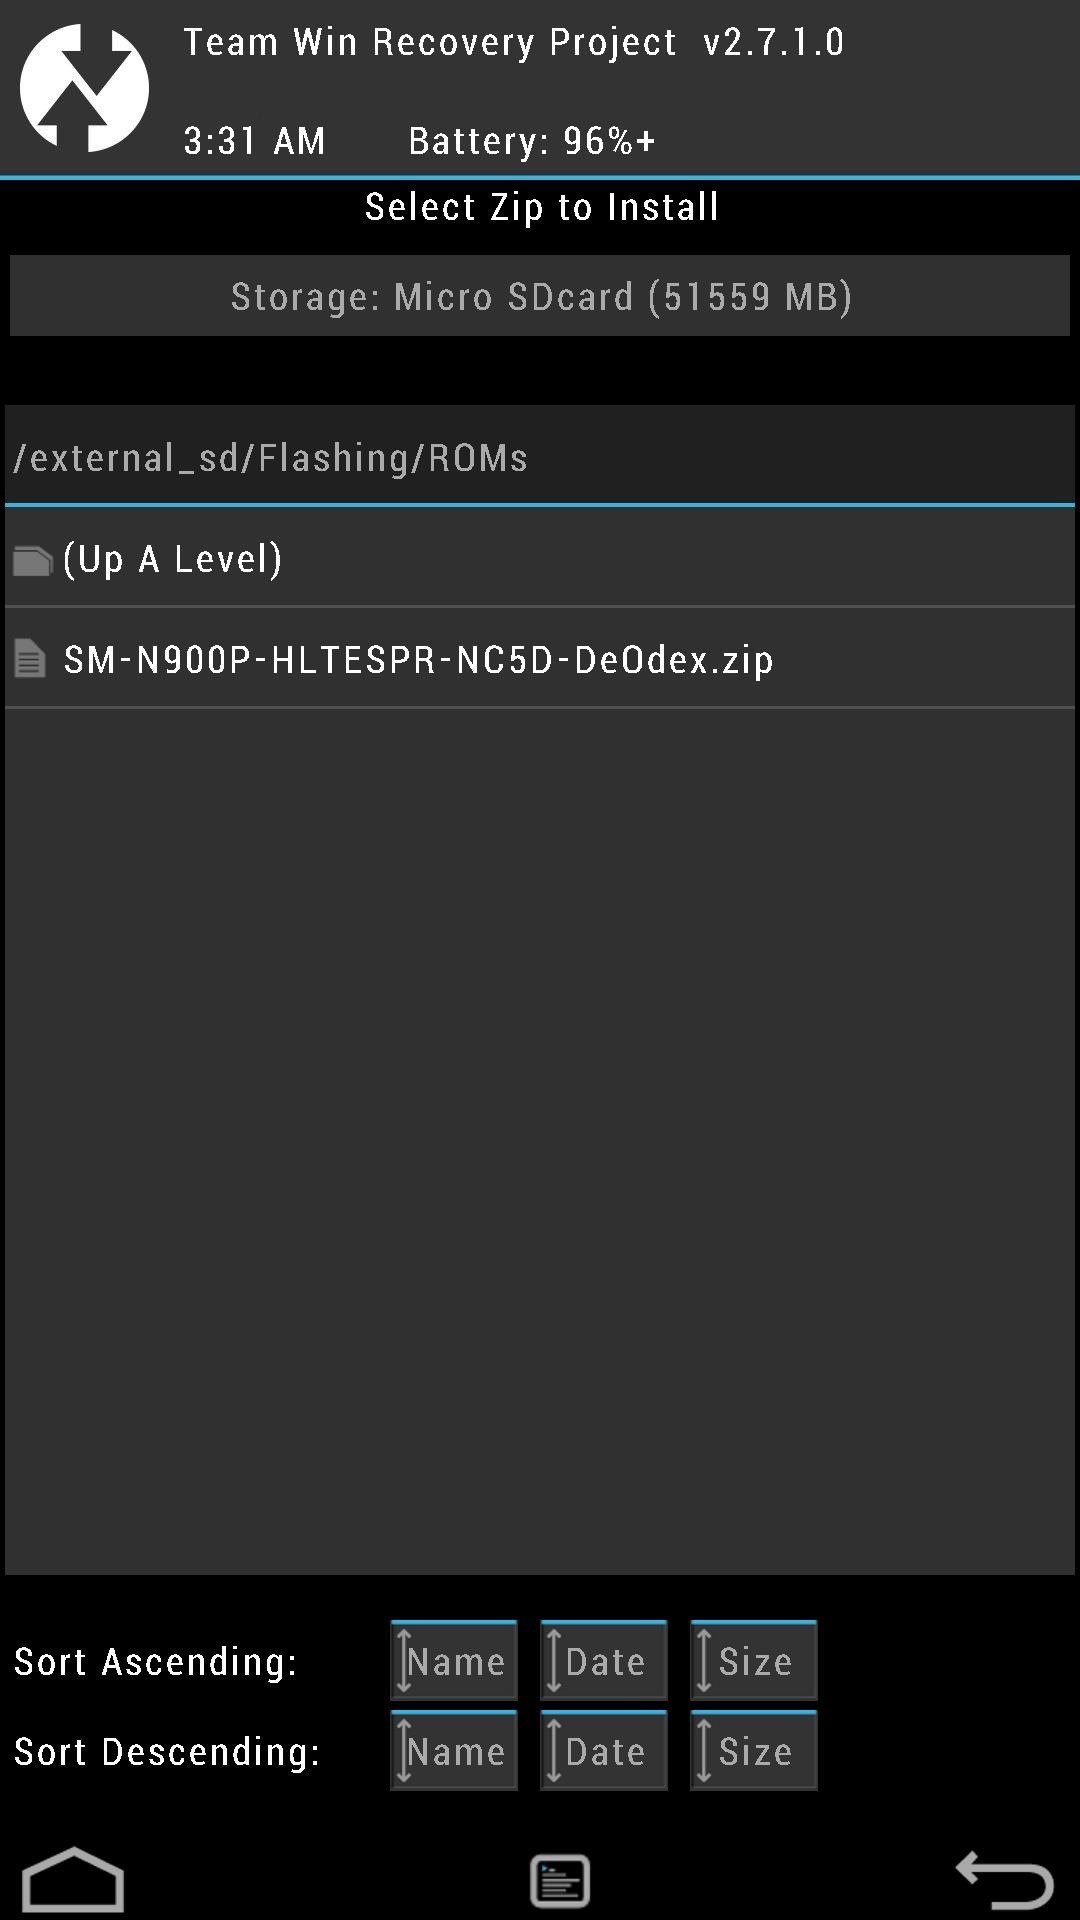
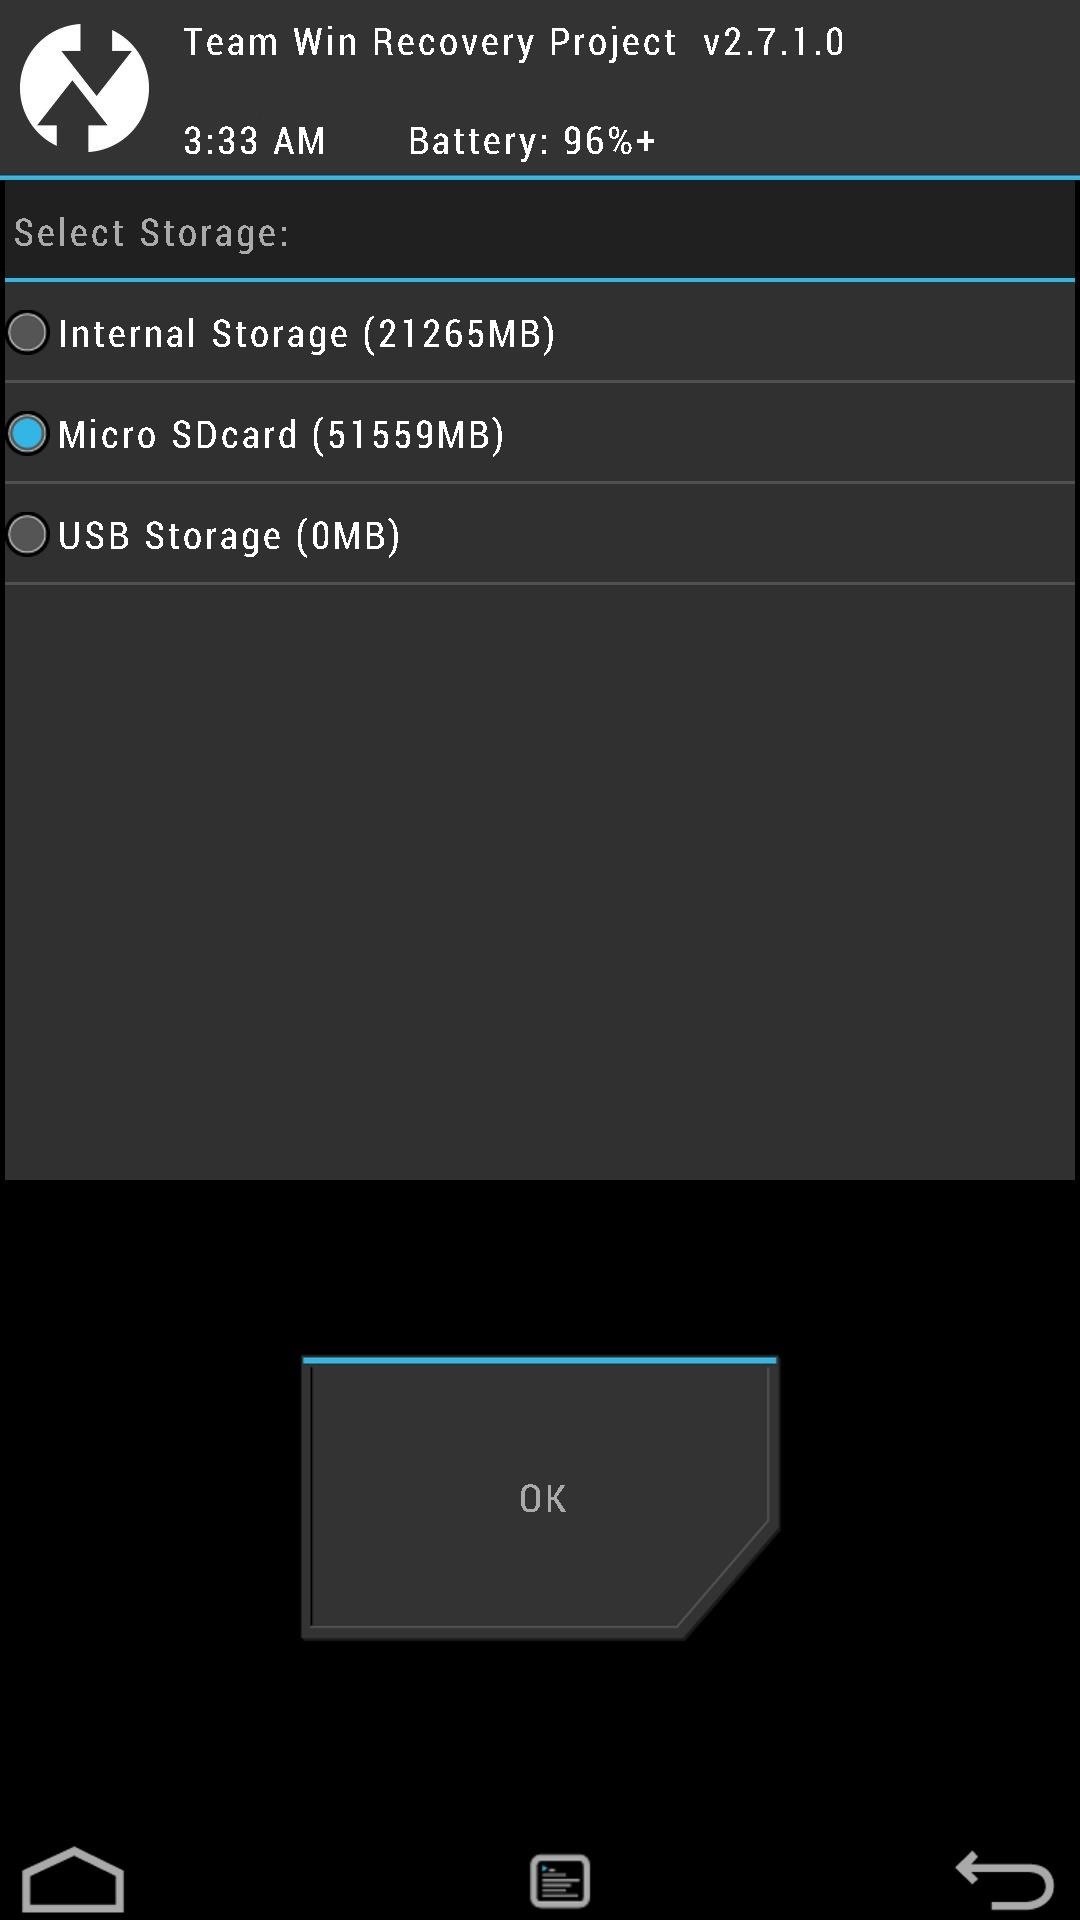
You can install them from your internal or external SD card (just tap on Storage to navigate between the two).
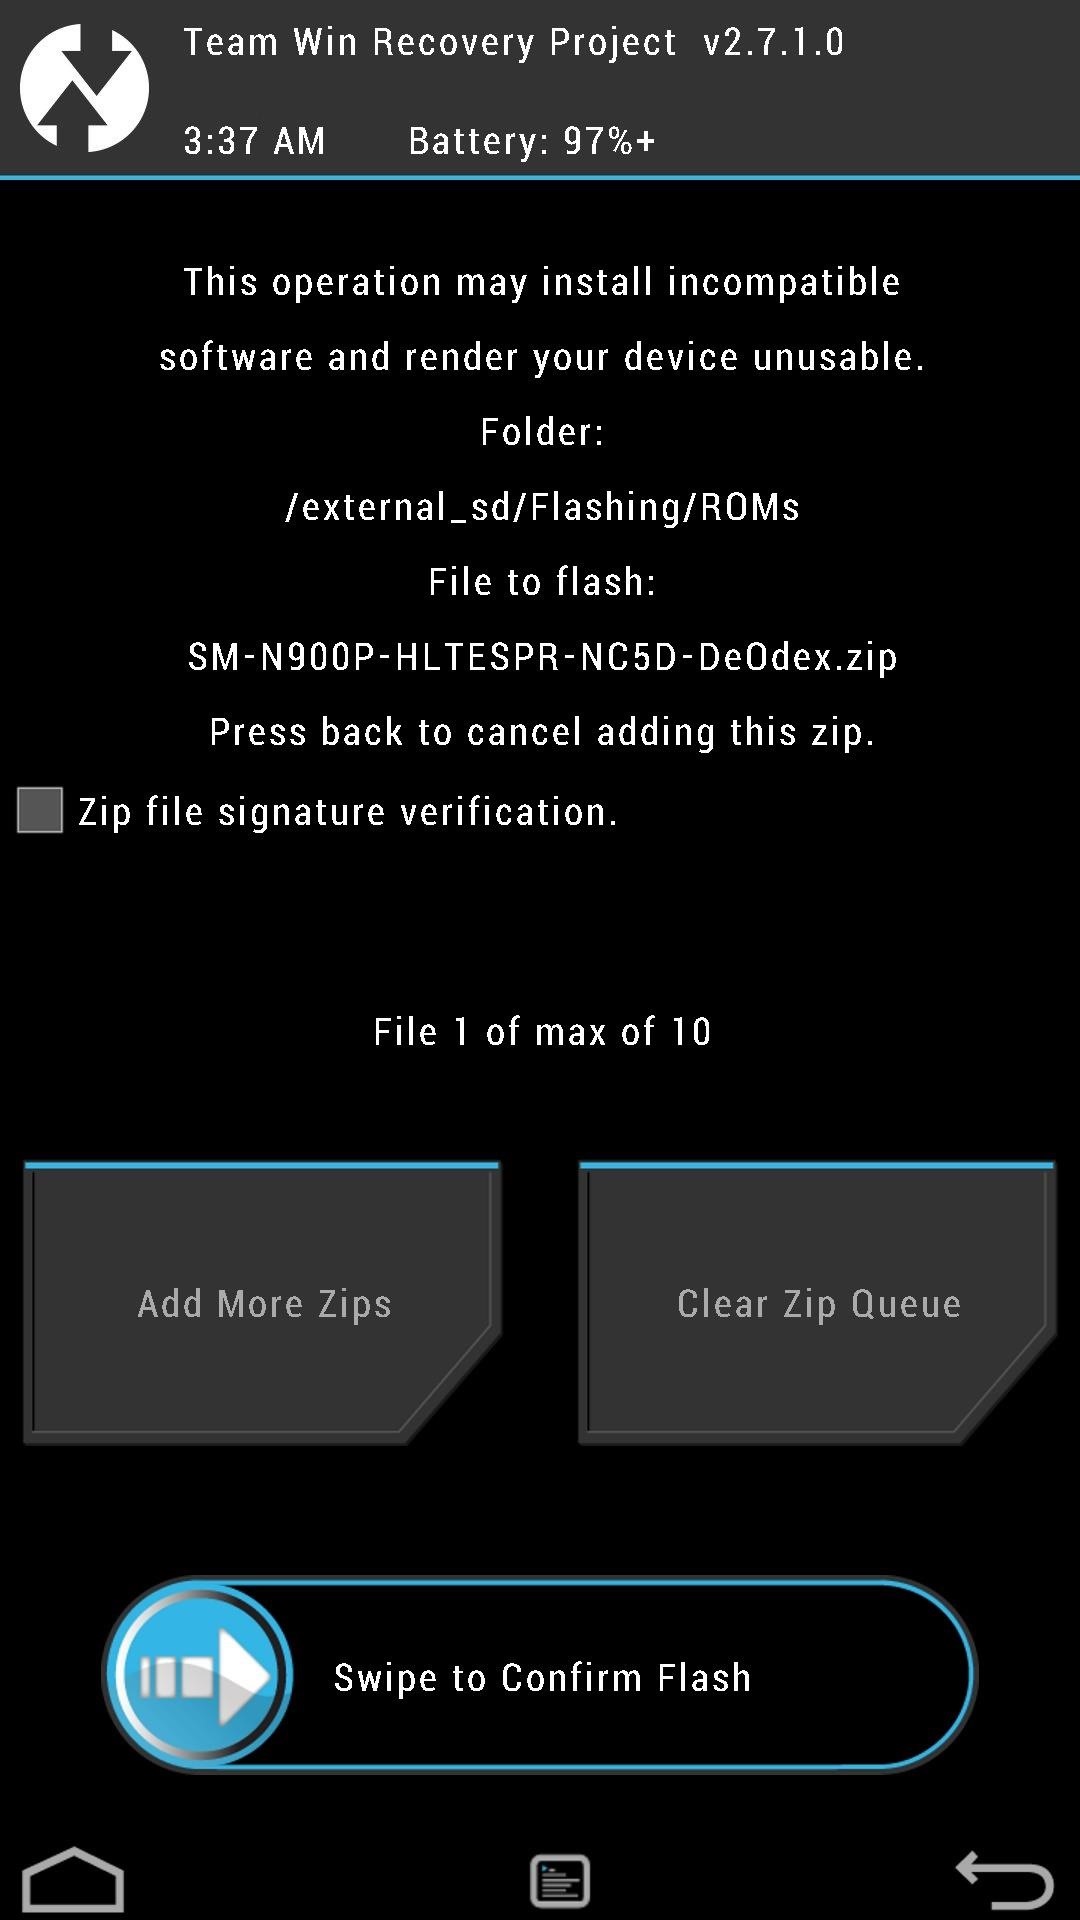
Tap on the .zip file you want to install, then use the Swipe to Confirm Flash button.
Flashing ROMs isn't so scary, right? To get yourself even more acquainted with TWRP, check out Dallas's in-depth guide.
What ROMs have you tried out? CyanogenMod? ParanoidAndroid? AOKP? Let us know in the comments how they've worked out for you.
Just updated your iPhone? You'll find new emoji, enhanced security, podcast transcripts, Apple Cash virtual numbers, and other useful features. There are even new additions hidden within Safari. Find out what's new and changed on your iPhone with the iOS 17.4 update.


1 Comment
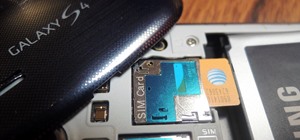
I am having troubles with my Samsung Not 3. I bought it thiinkingh it was not rooted as i was told and tried to unroot it but messed up somewhere. Now when I turn on the device it will not go past the boot image screen. I can however get to the twrp recovery holding the vol+ , home, power. my p.c doesn't recognize the device through usb but will charge. my question is, isz there any way to flash the stock or mod rom from external sd card through twrp? or any other way with out pc? an image file maybe, and if so how to create one or download one? please tell me there is a solution for this. feel free to email me.
tattoosynn@
cfcoleman75@
gmail.com
Share Your Thoughts